Setting up your APN

Android
Please follow the instructions below to create a plan.com configuration profile that gives you direct access to our data services.
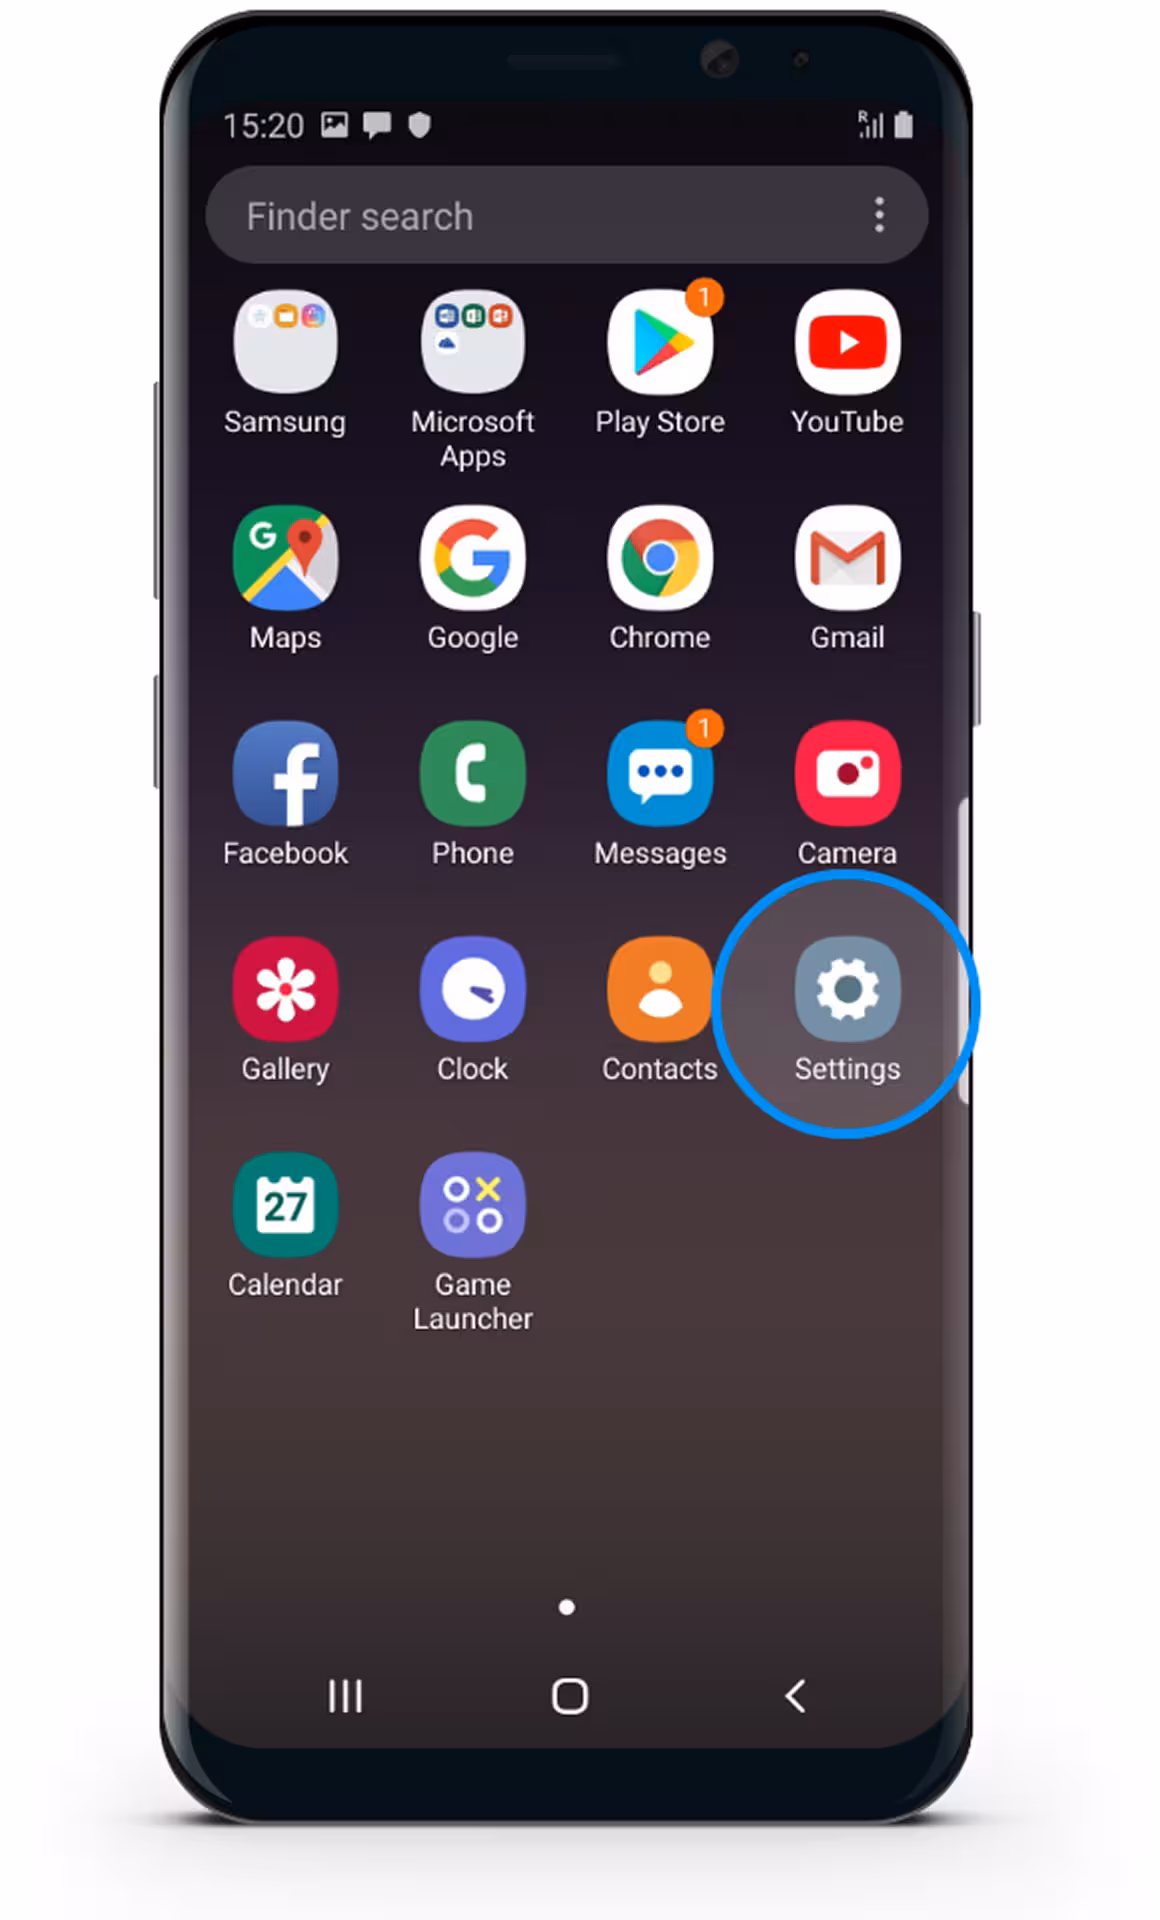
Select Settings
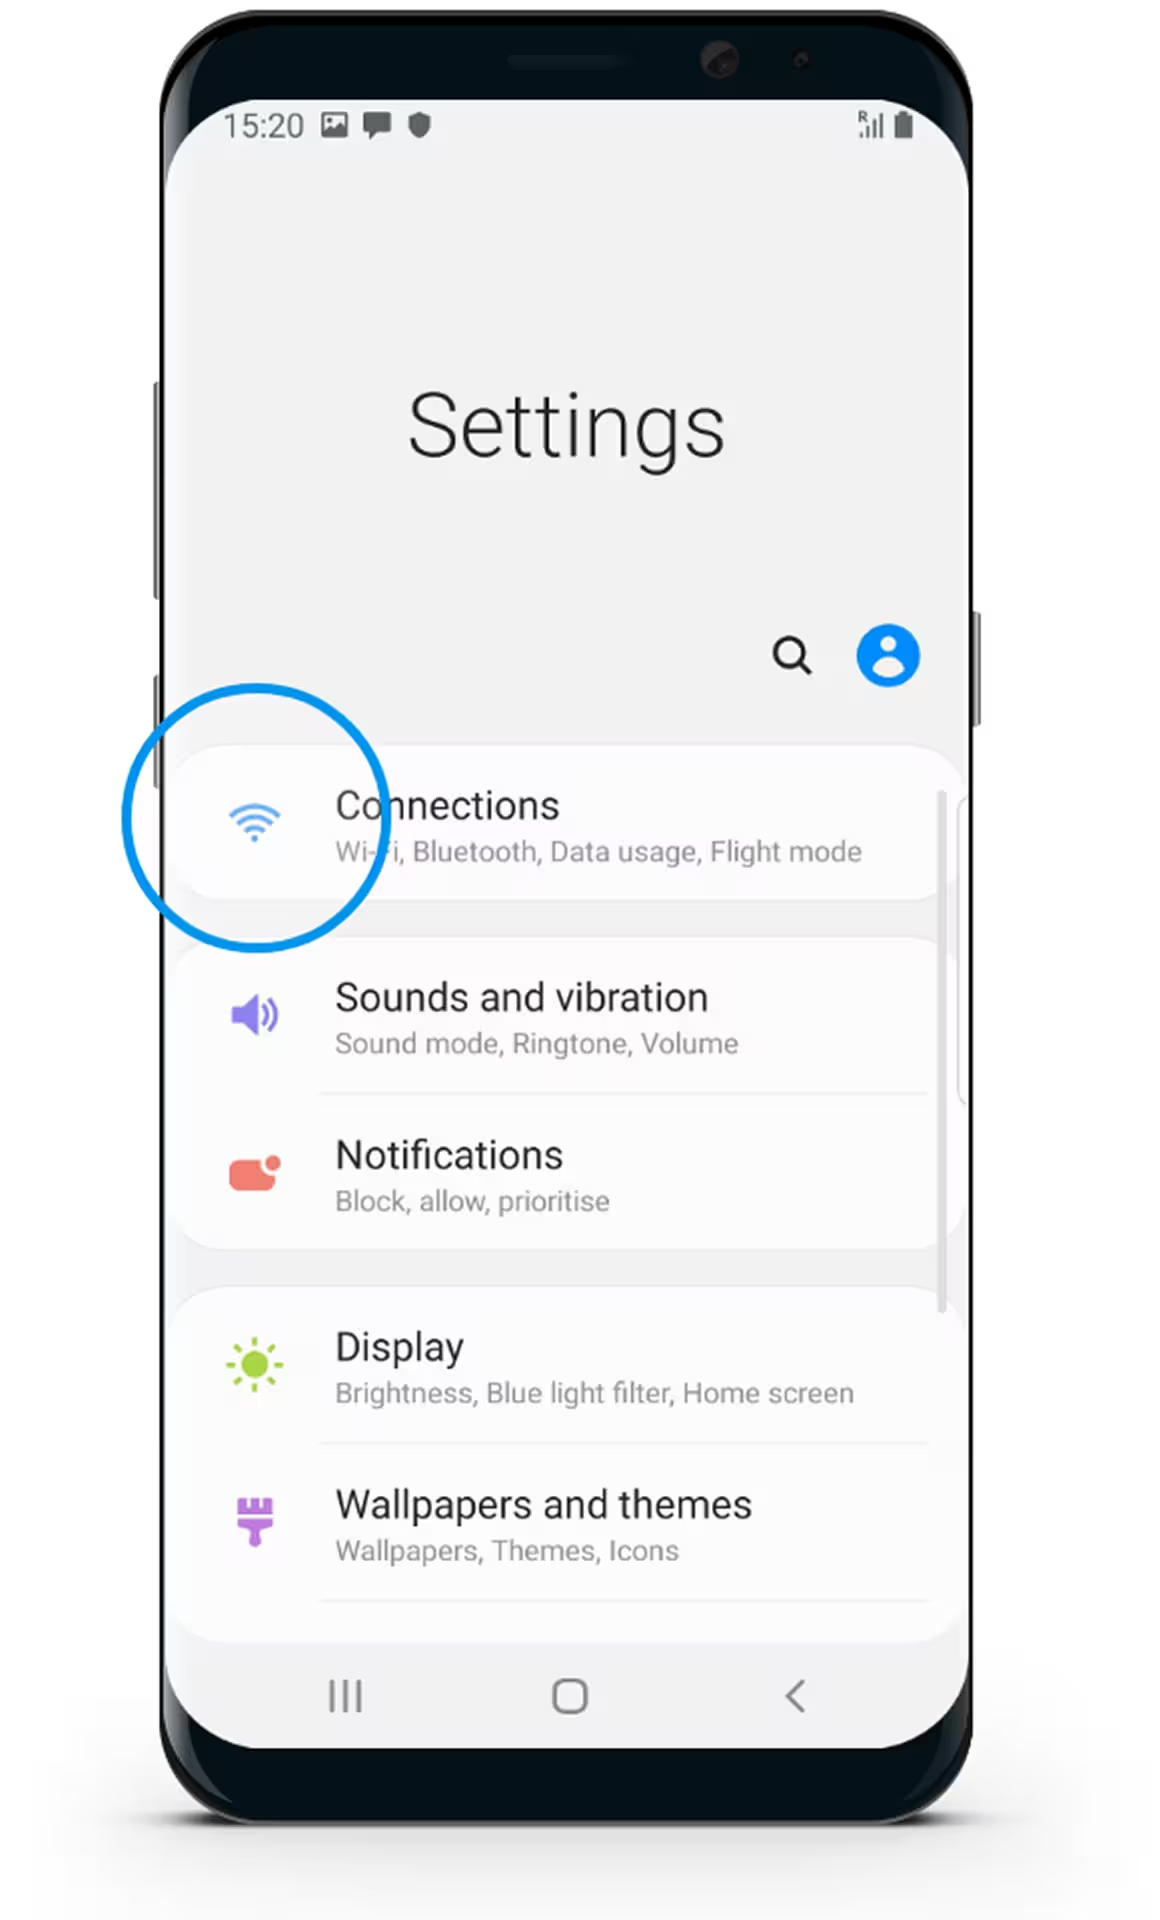
Select Connections
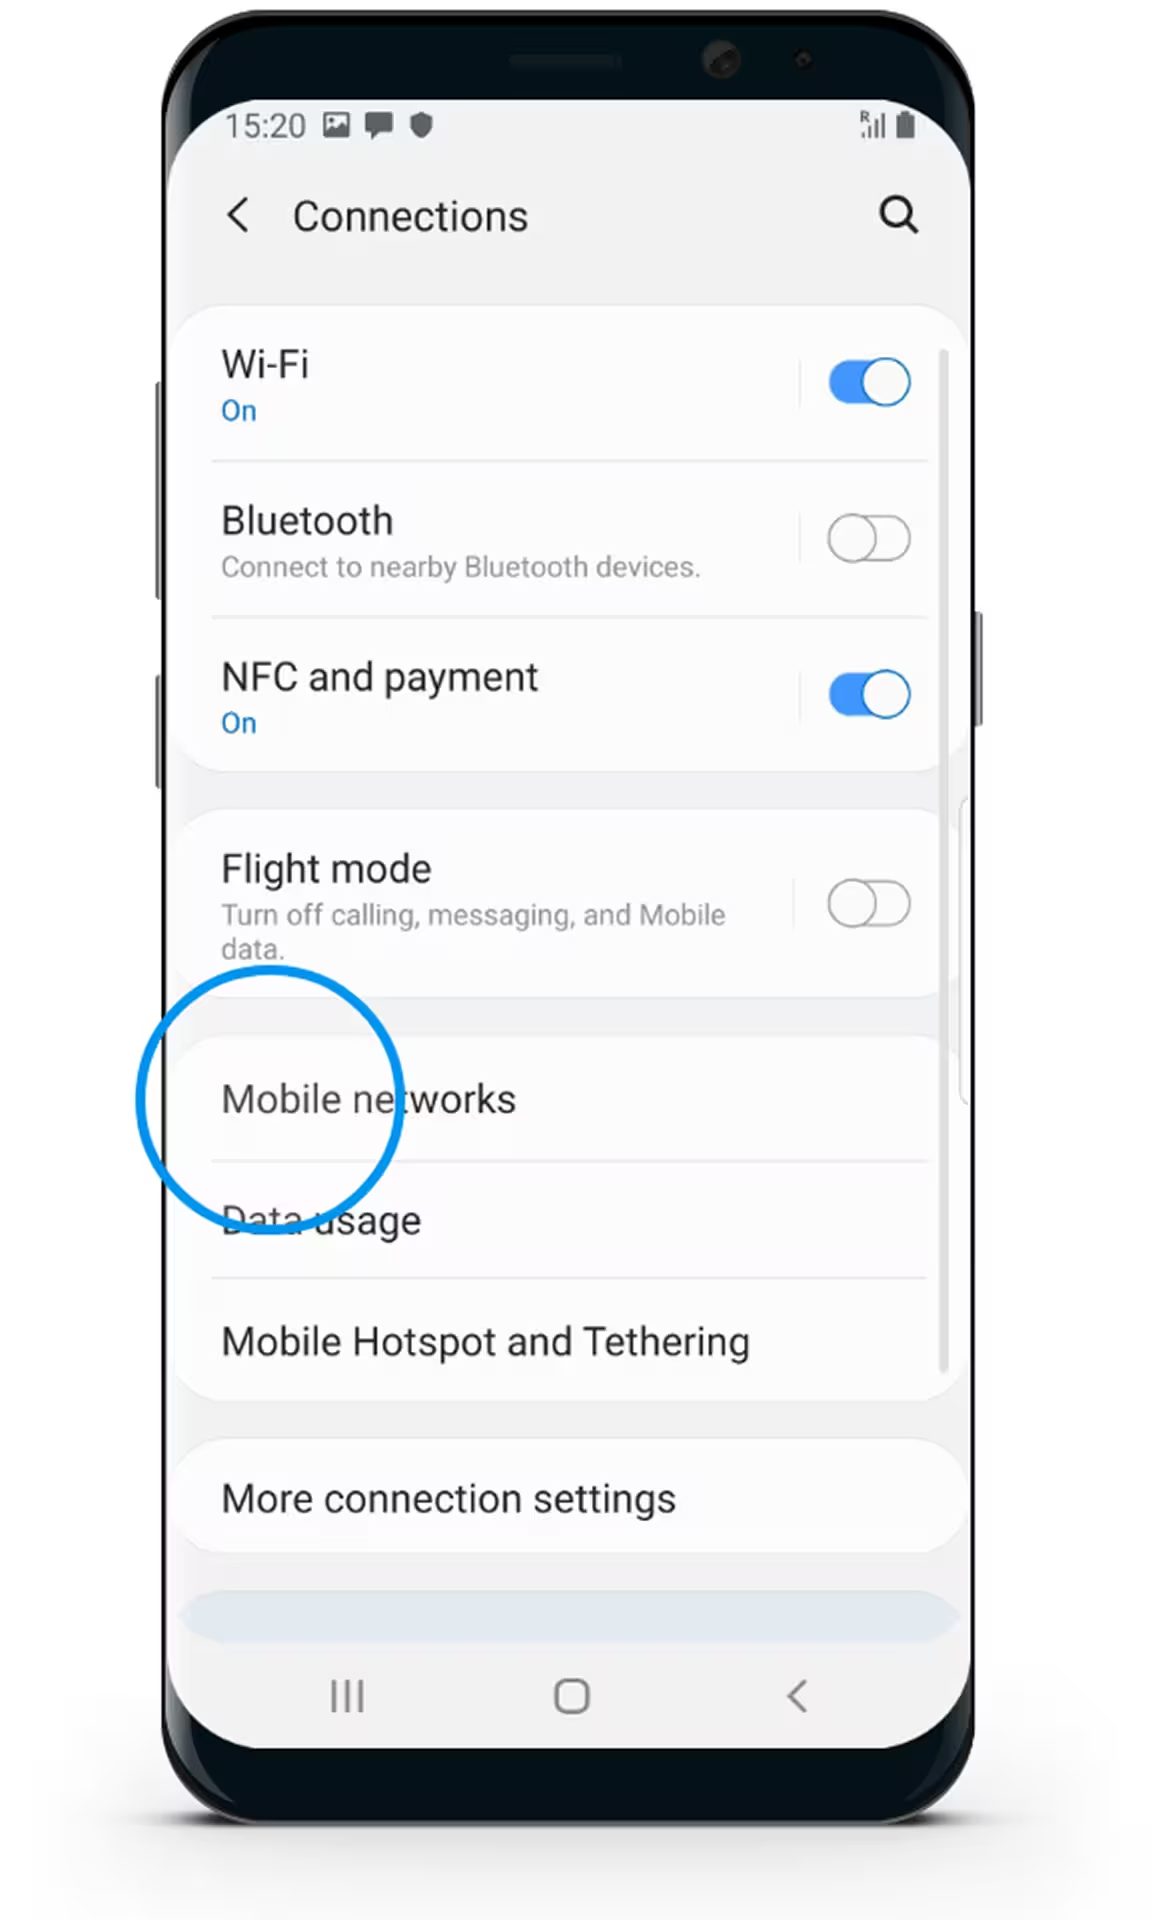
Select Mobile networks

Select Access Point Names

Select the Menu button

Select Reset to default
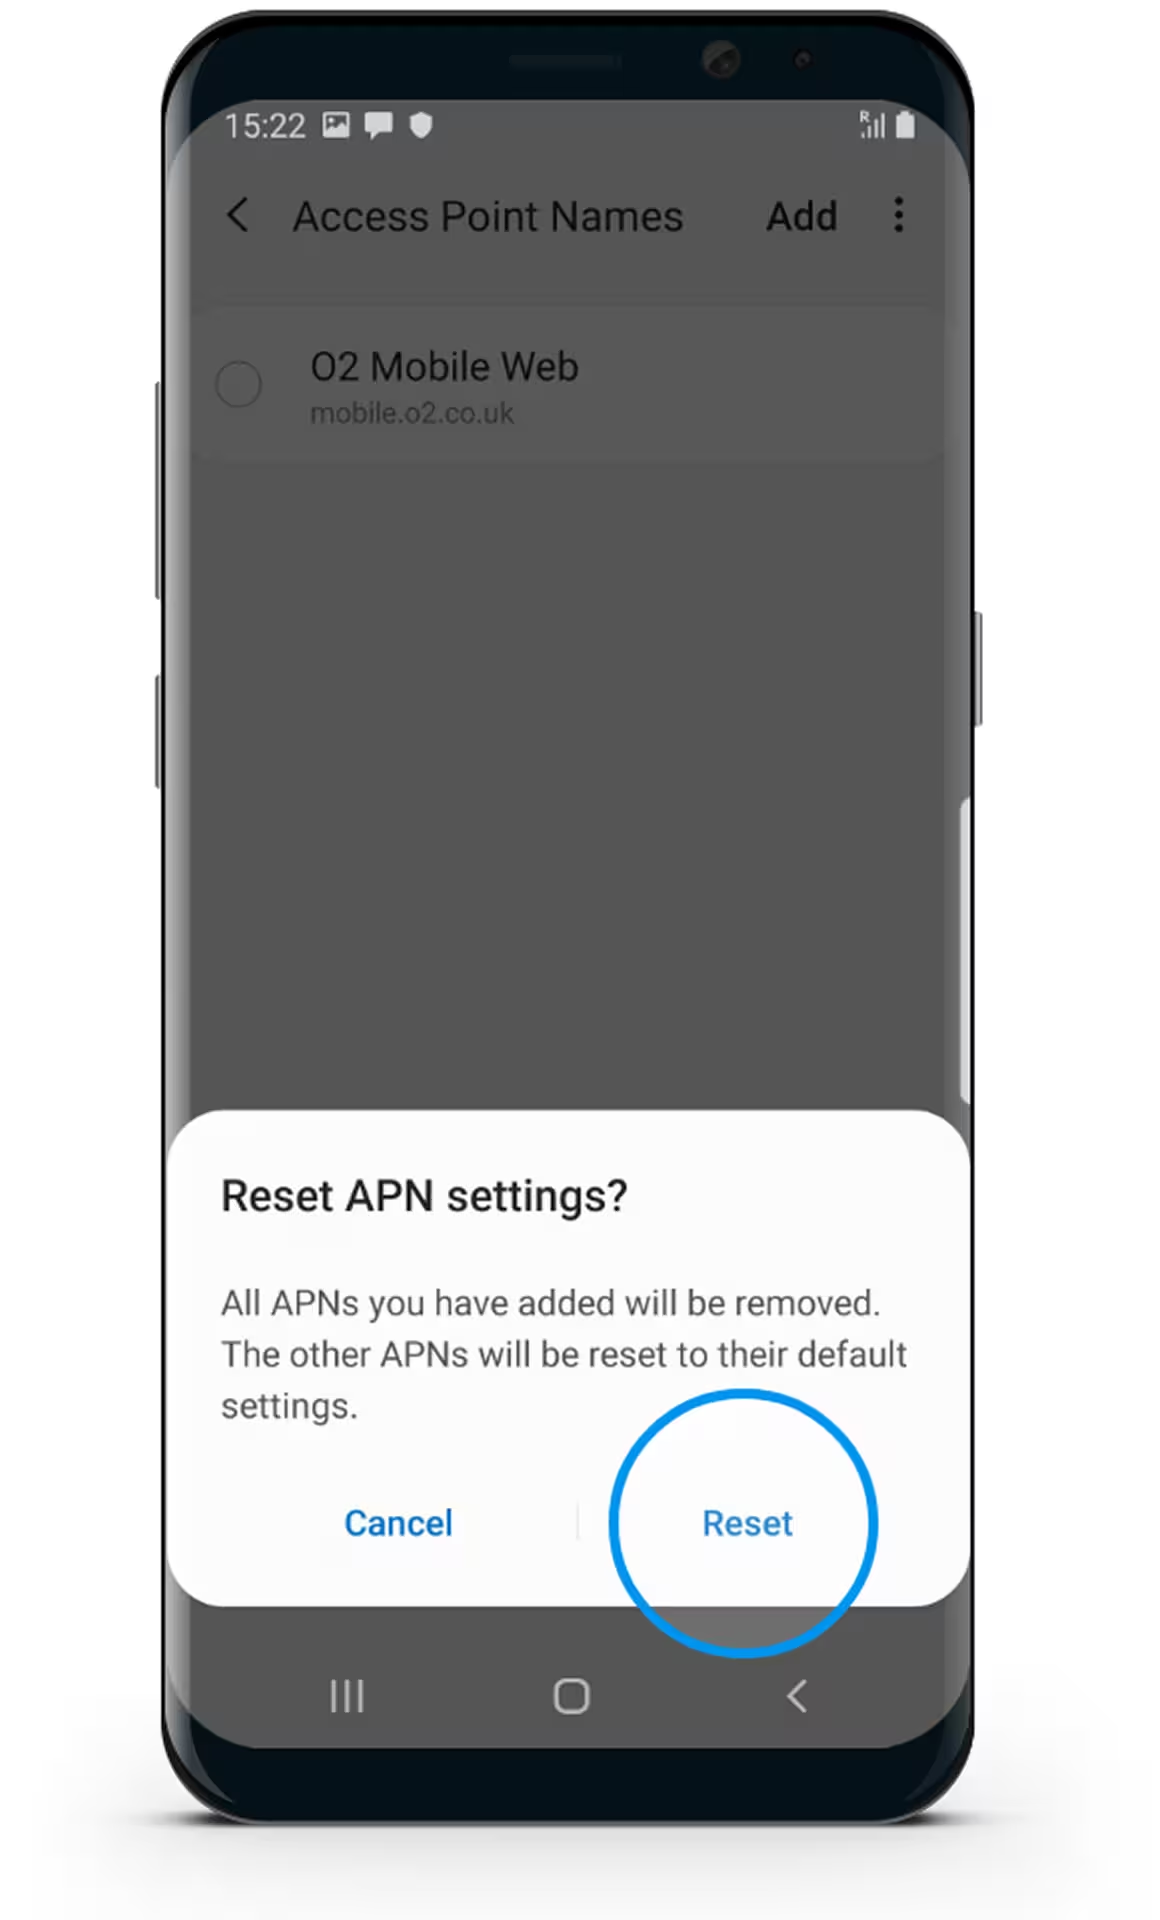
Select Reset - Your phone will reset to default Internet and MMS settings.
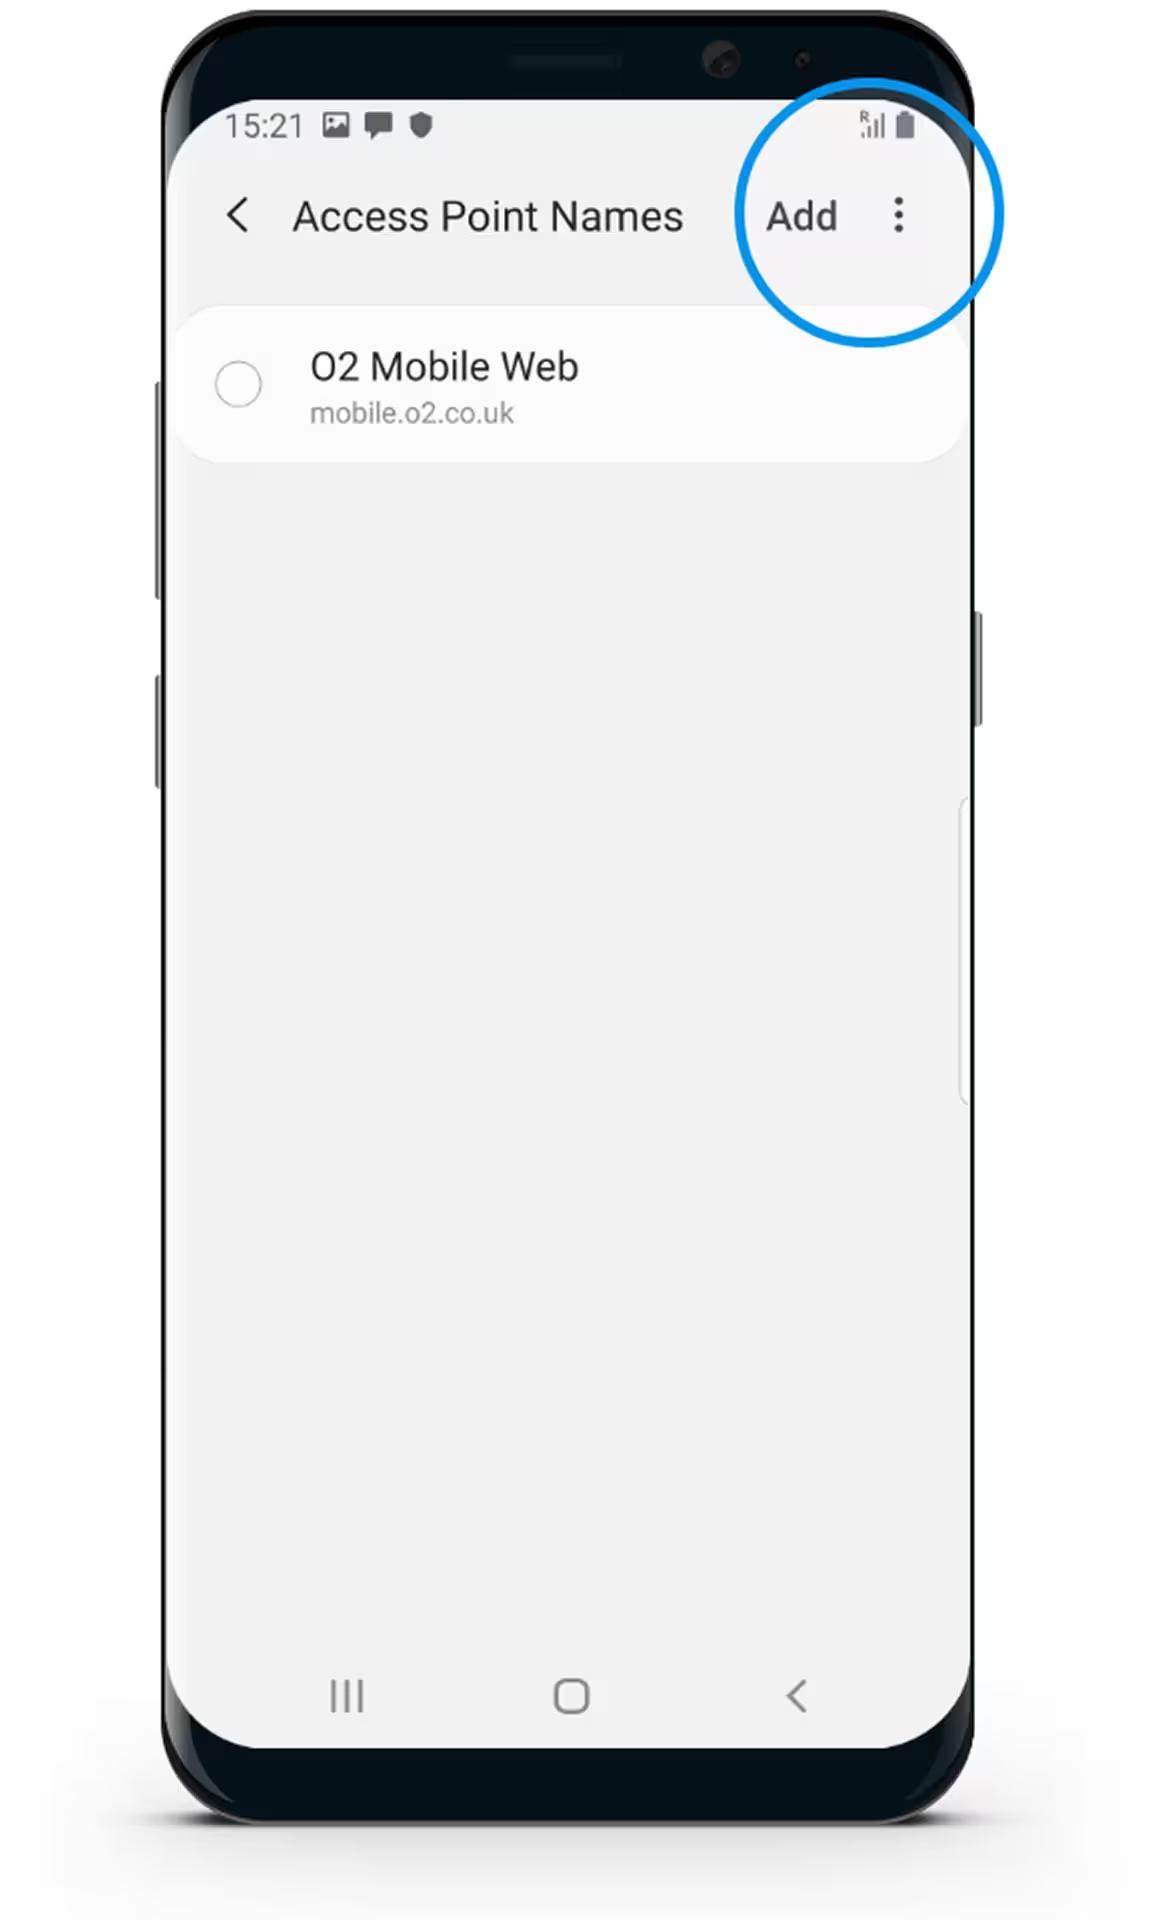
Select Add
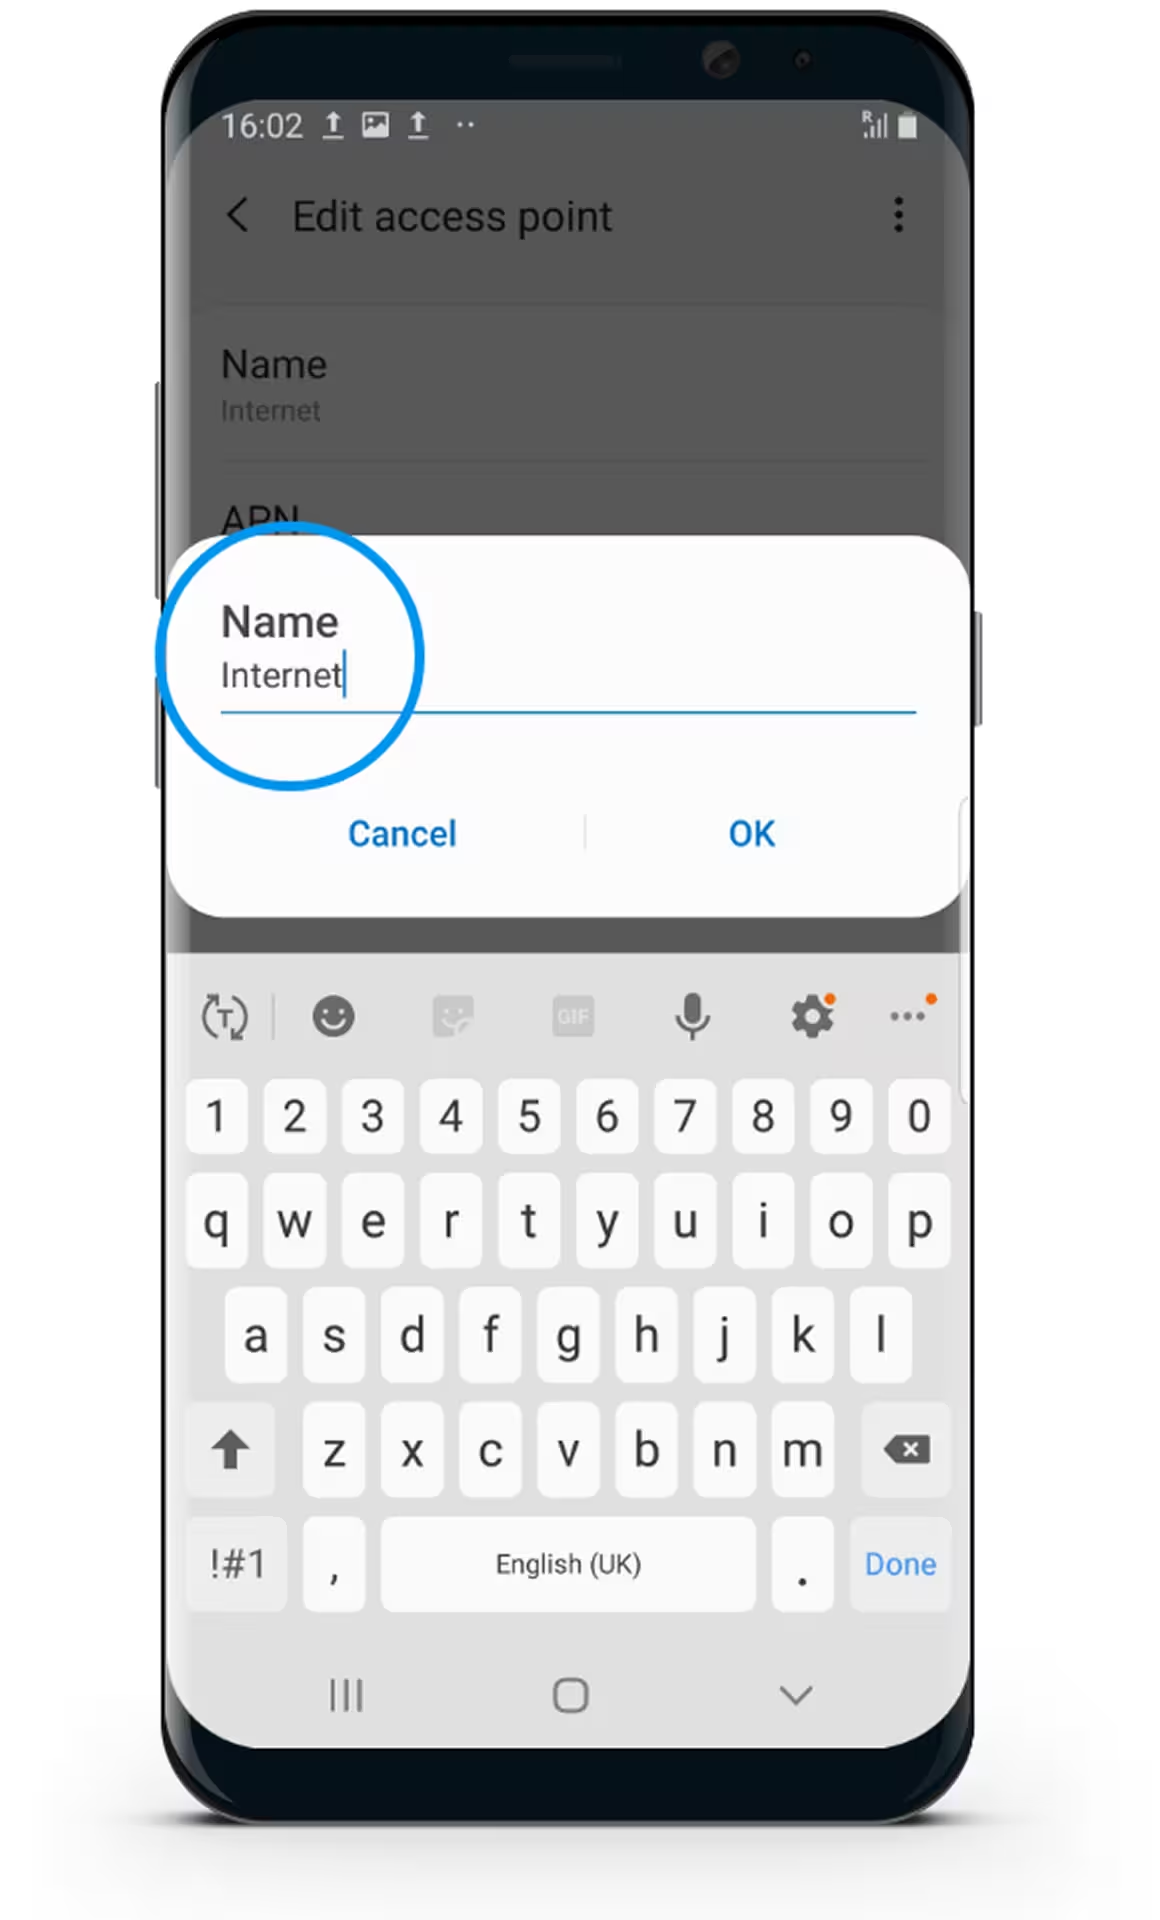
Select Name & Enter "Internet”
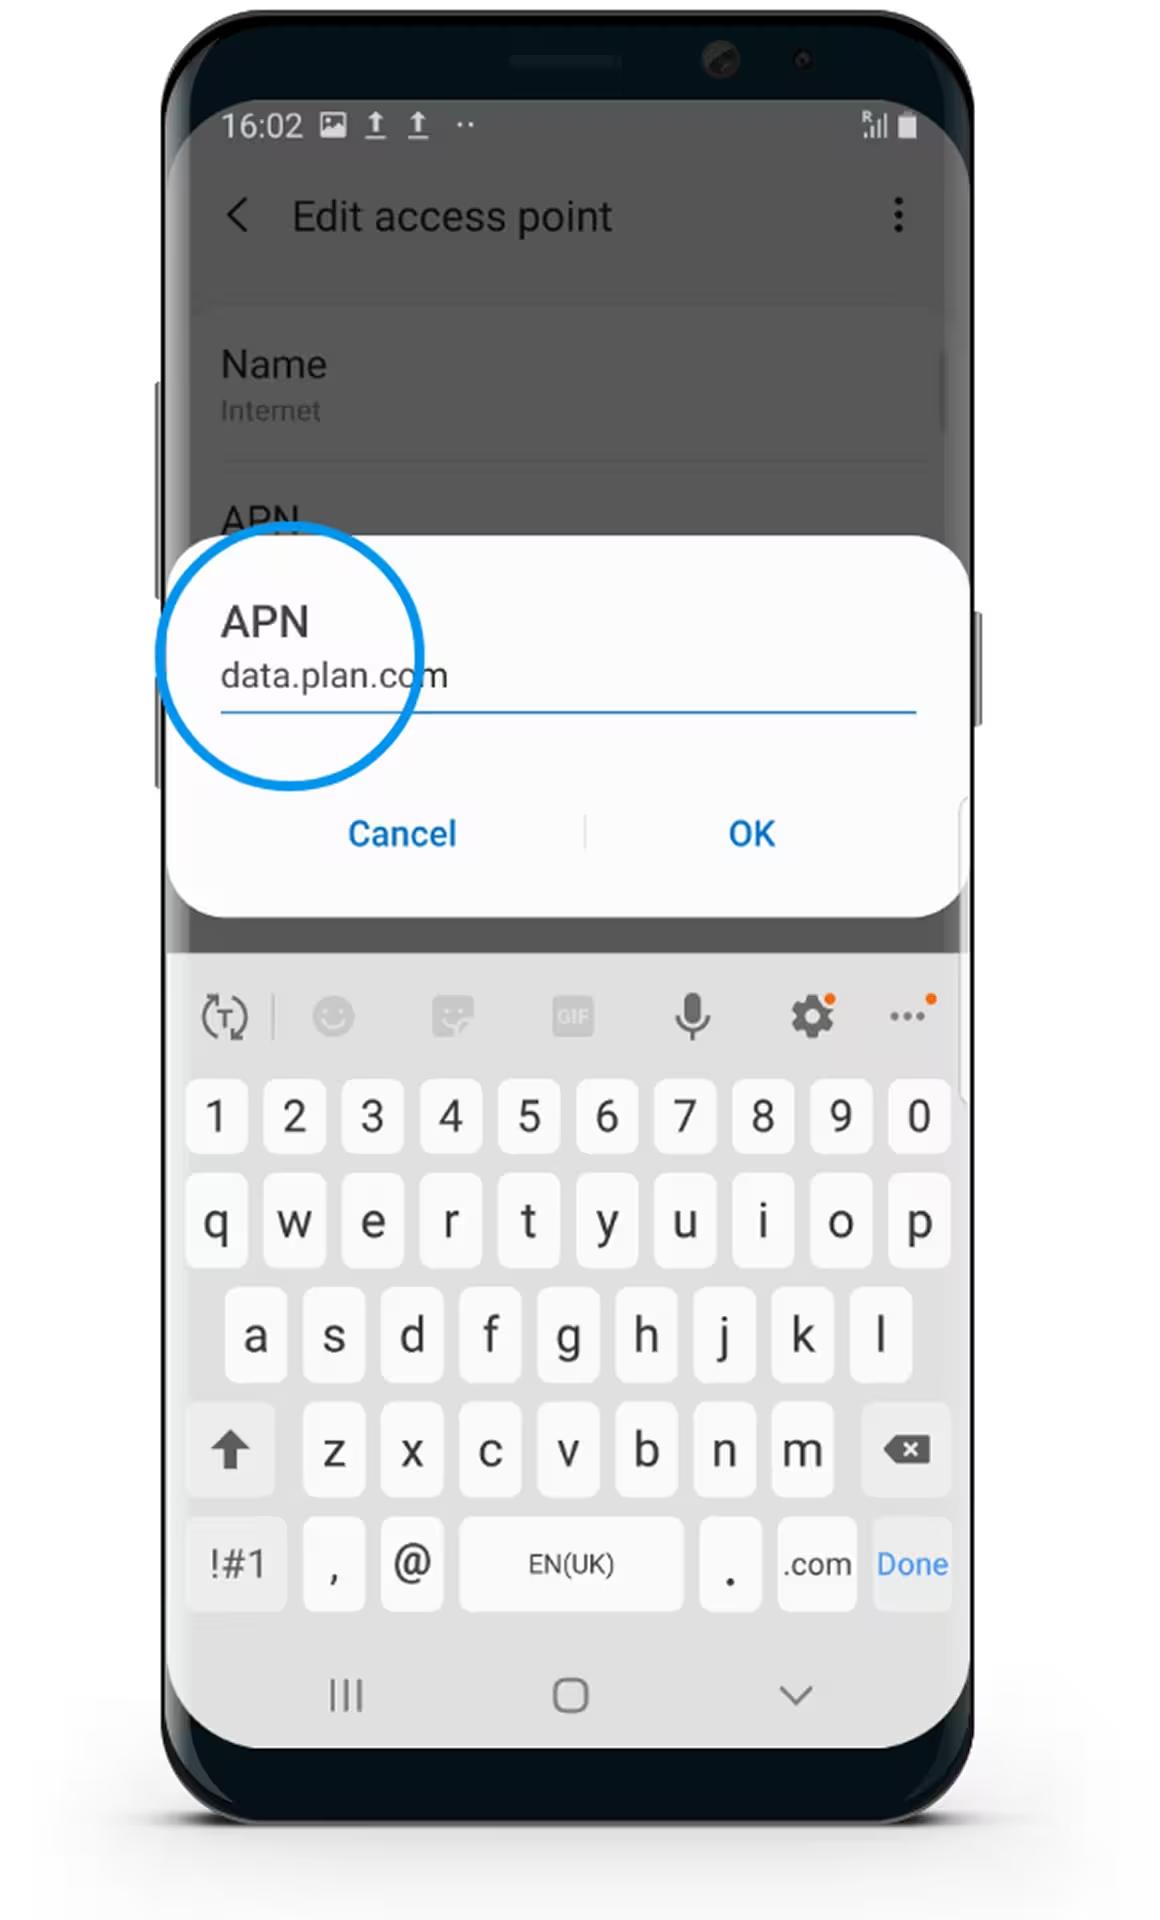
Select APN & Enter "data.plan.com"
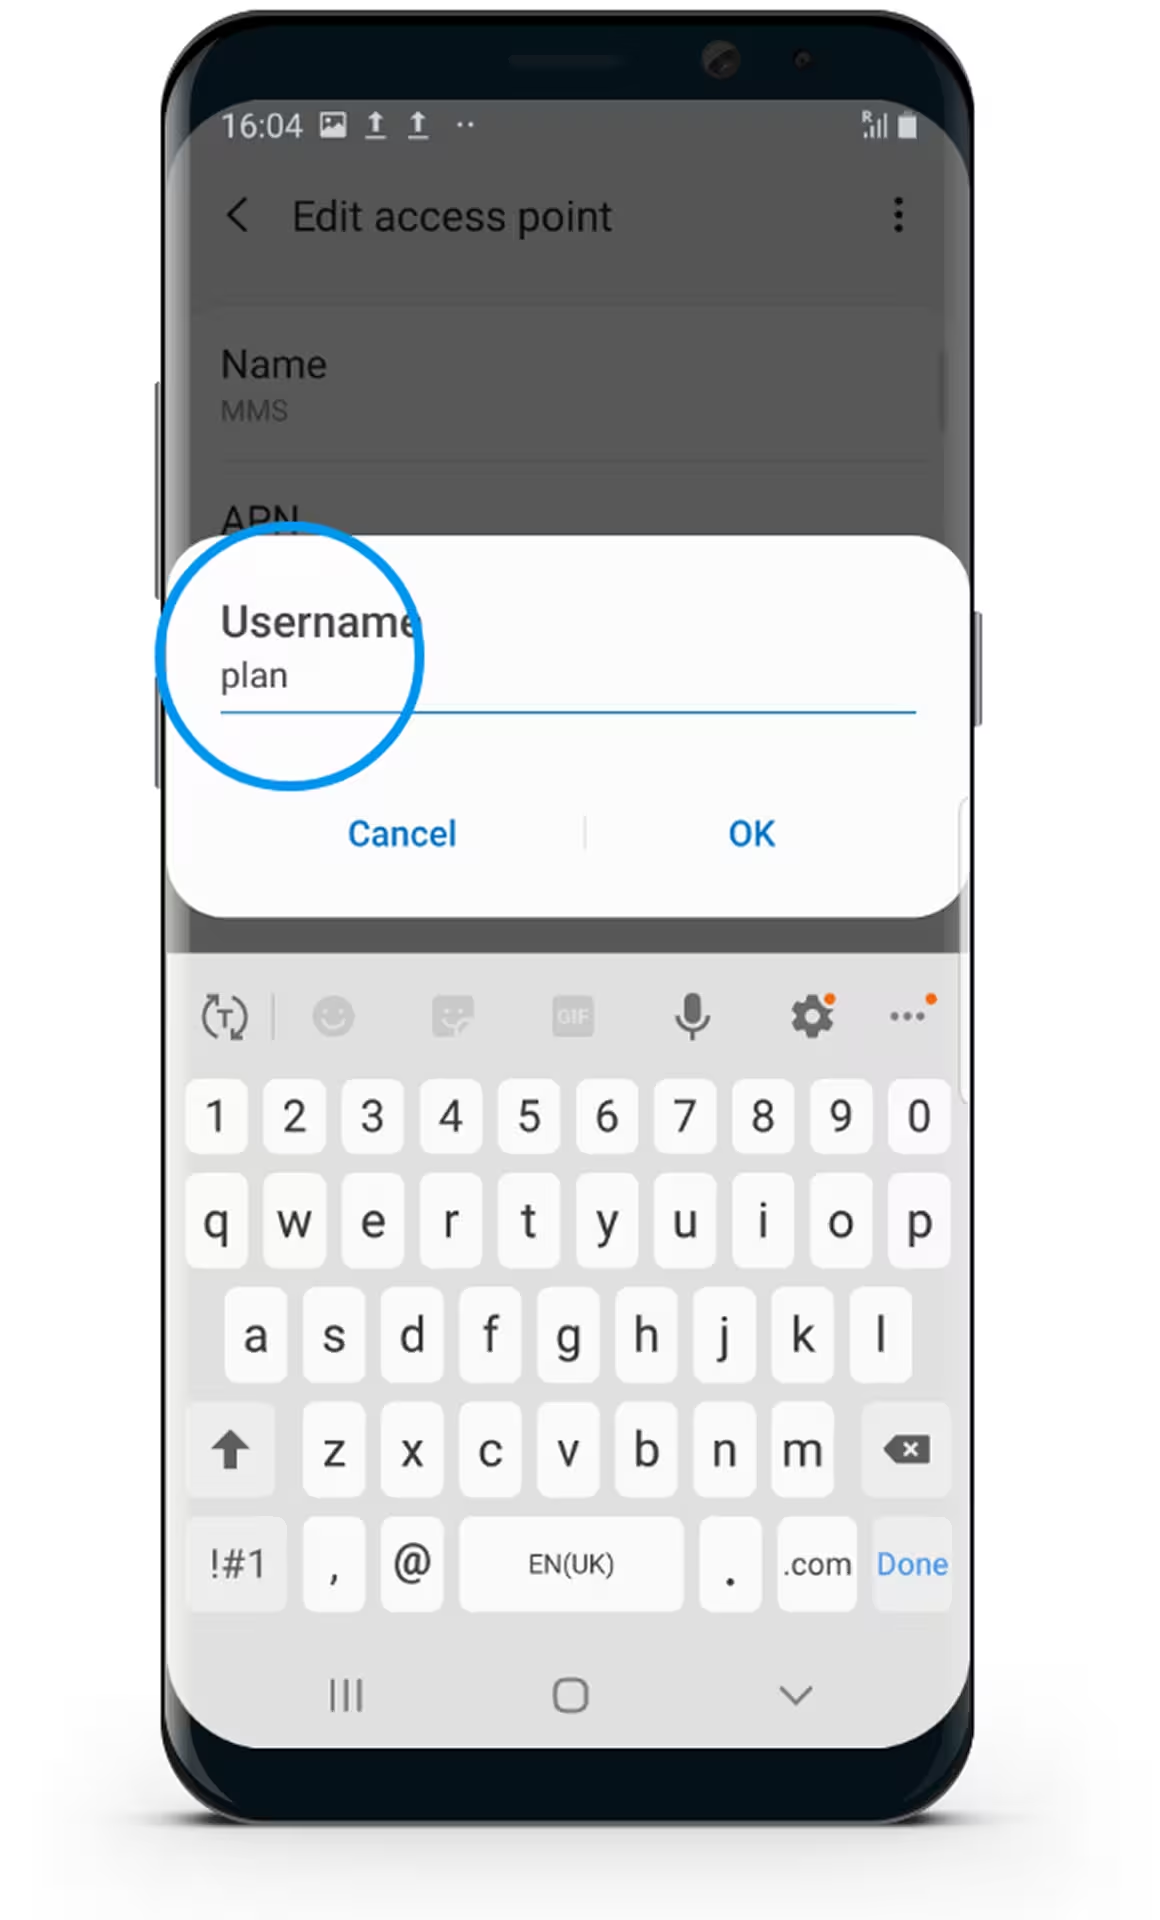
Select Username & Enter "plan"
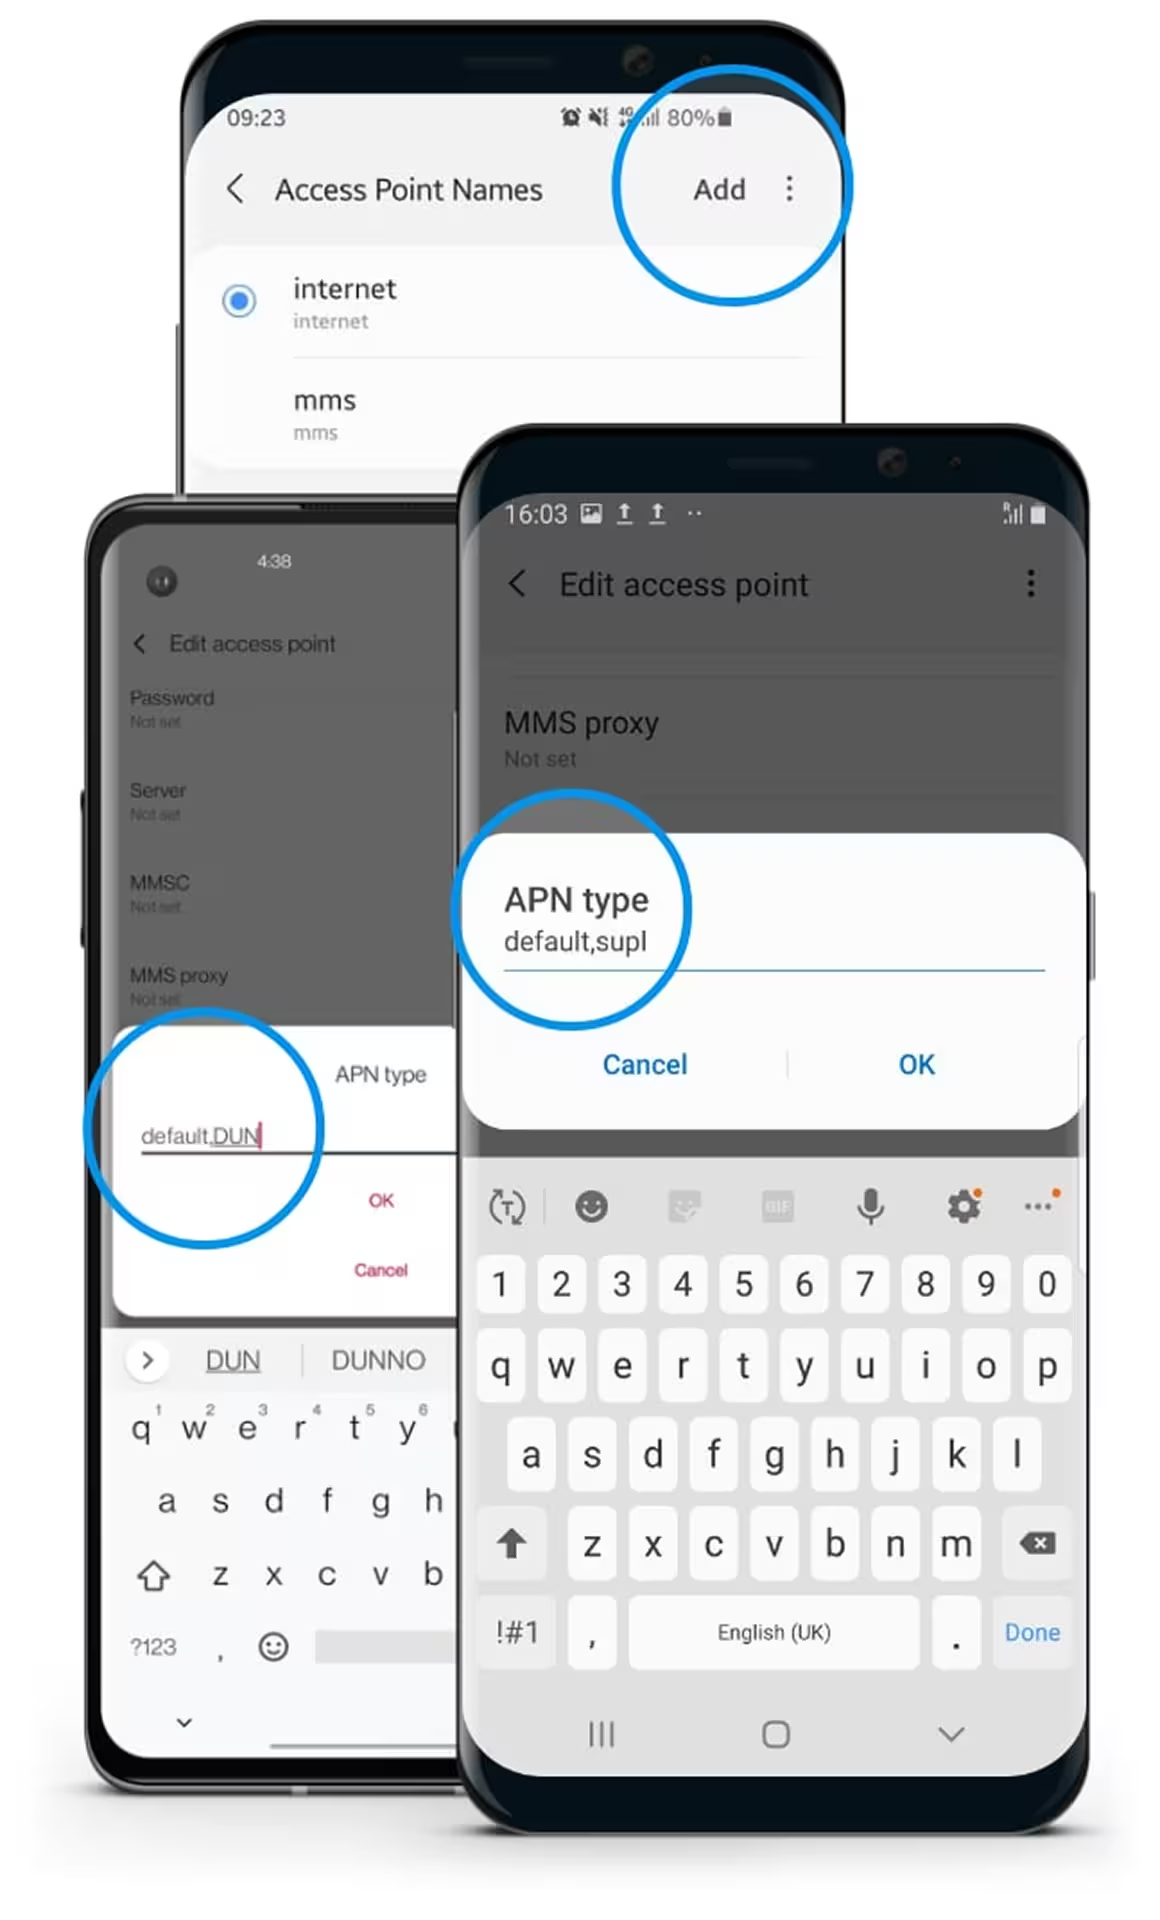
Depending on your device, in the "APN type" filed, either select "internet" or if using a Samsung device, enter "default,supl" & using a OnePlus or Google Pixel device, enter "default,DUN" then press ok
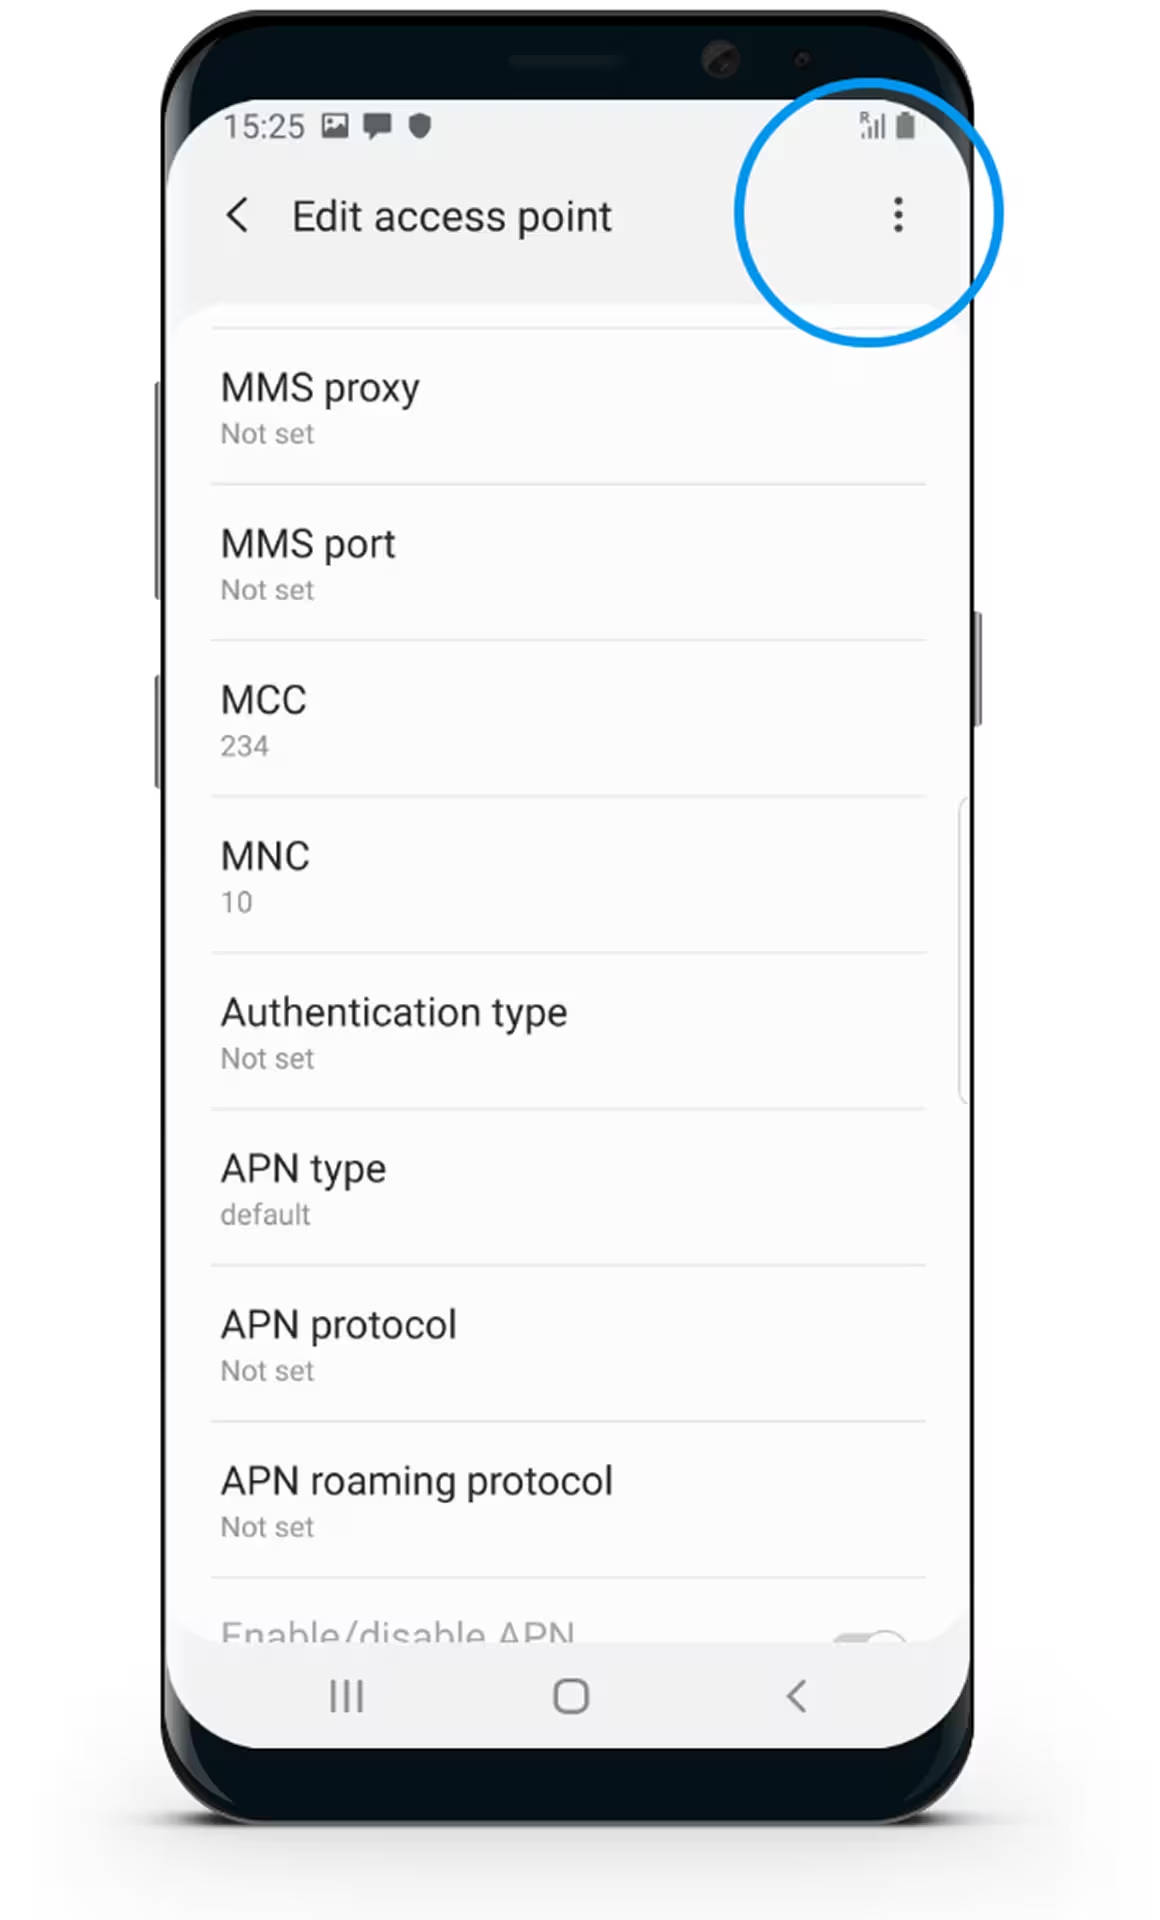
Select the Menu button

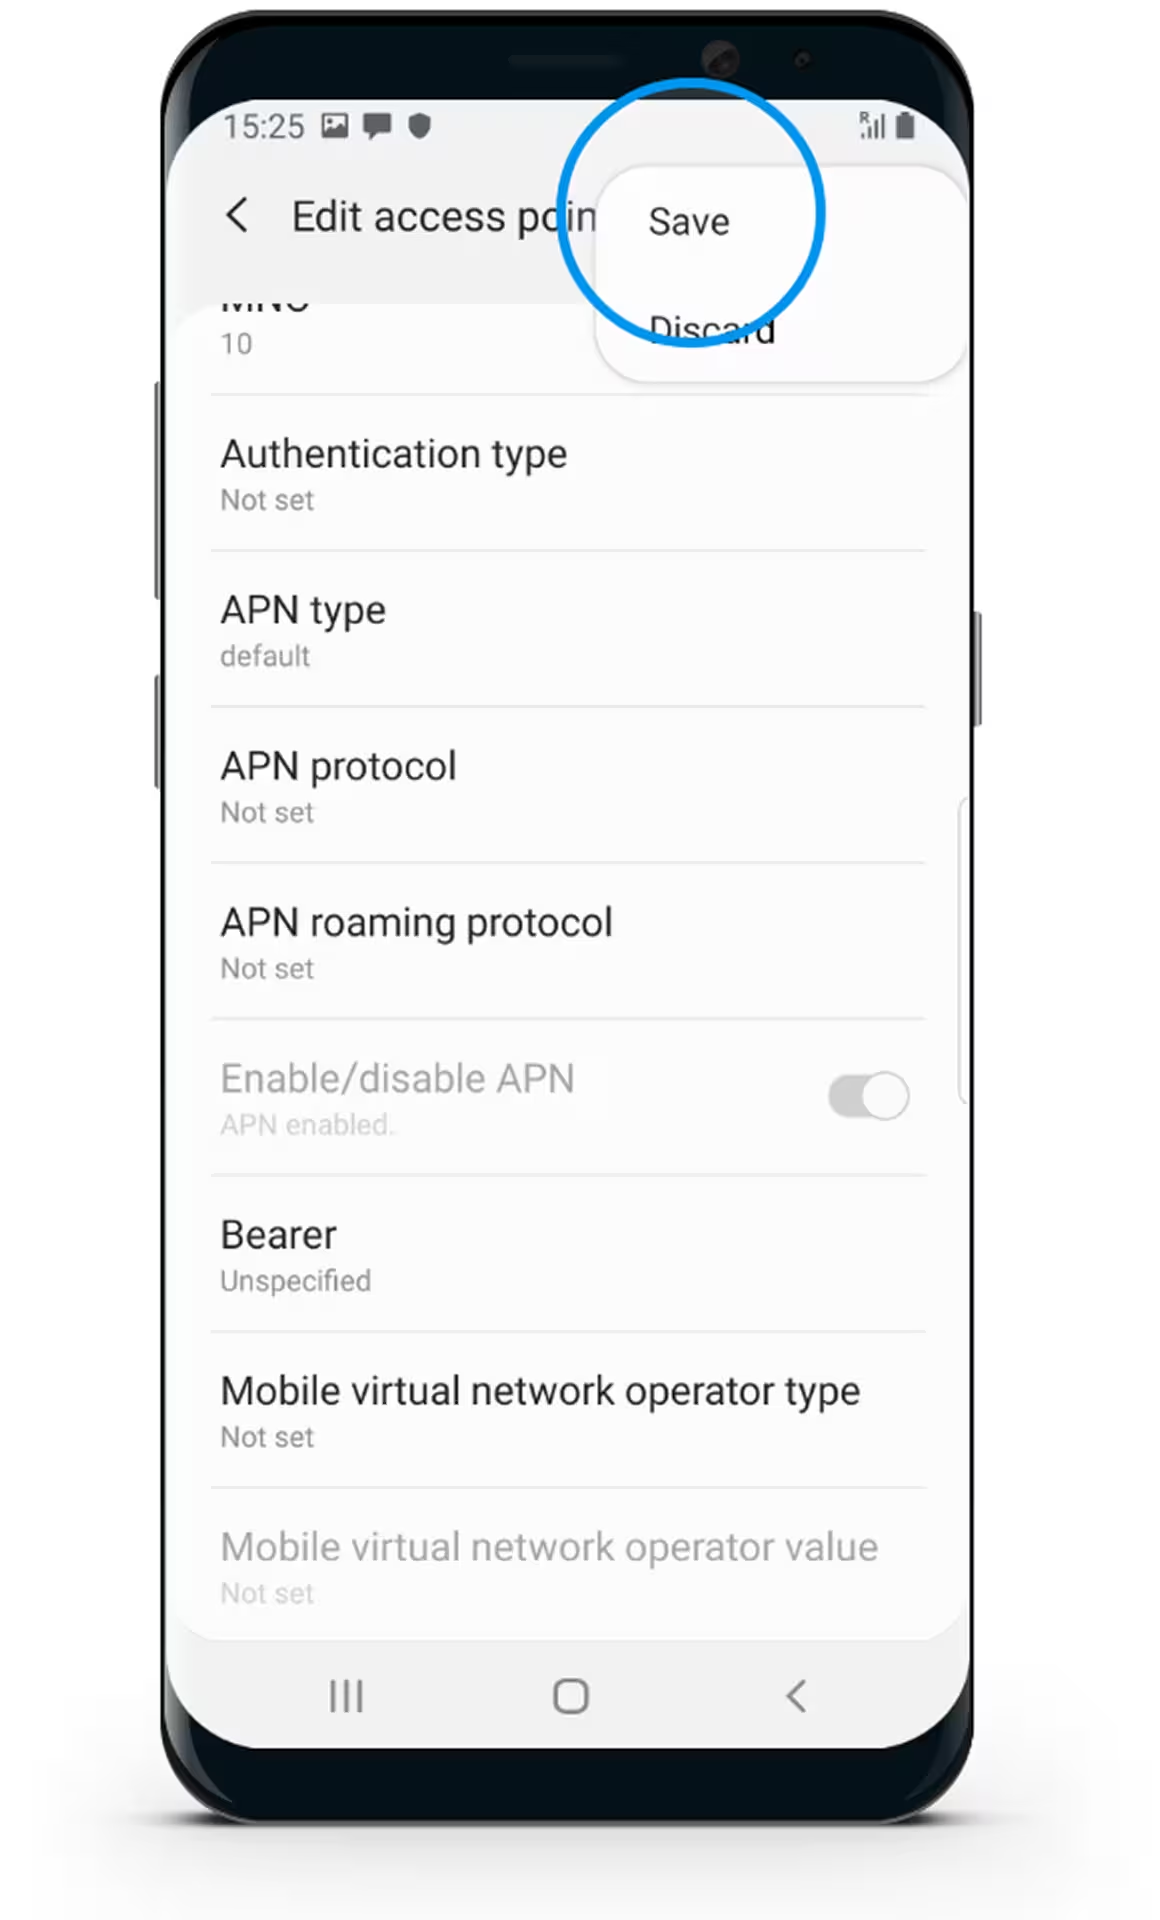
Select Save
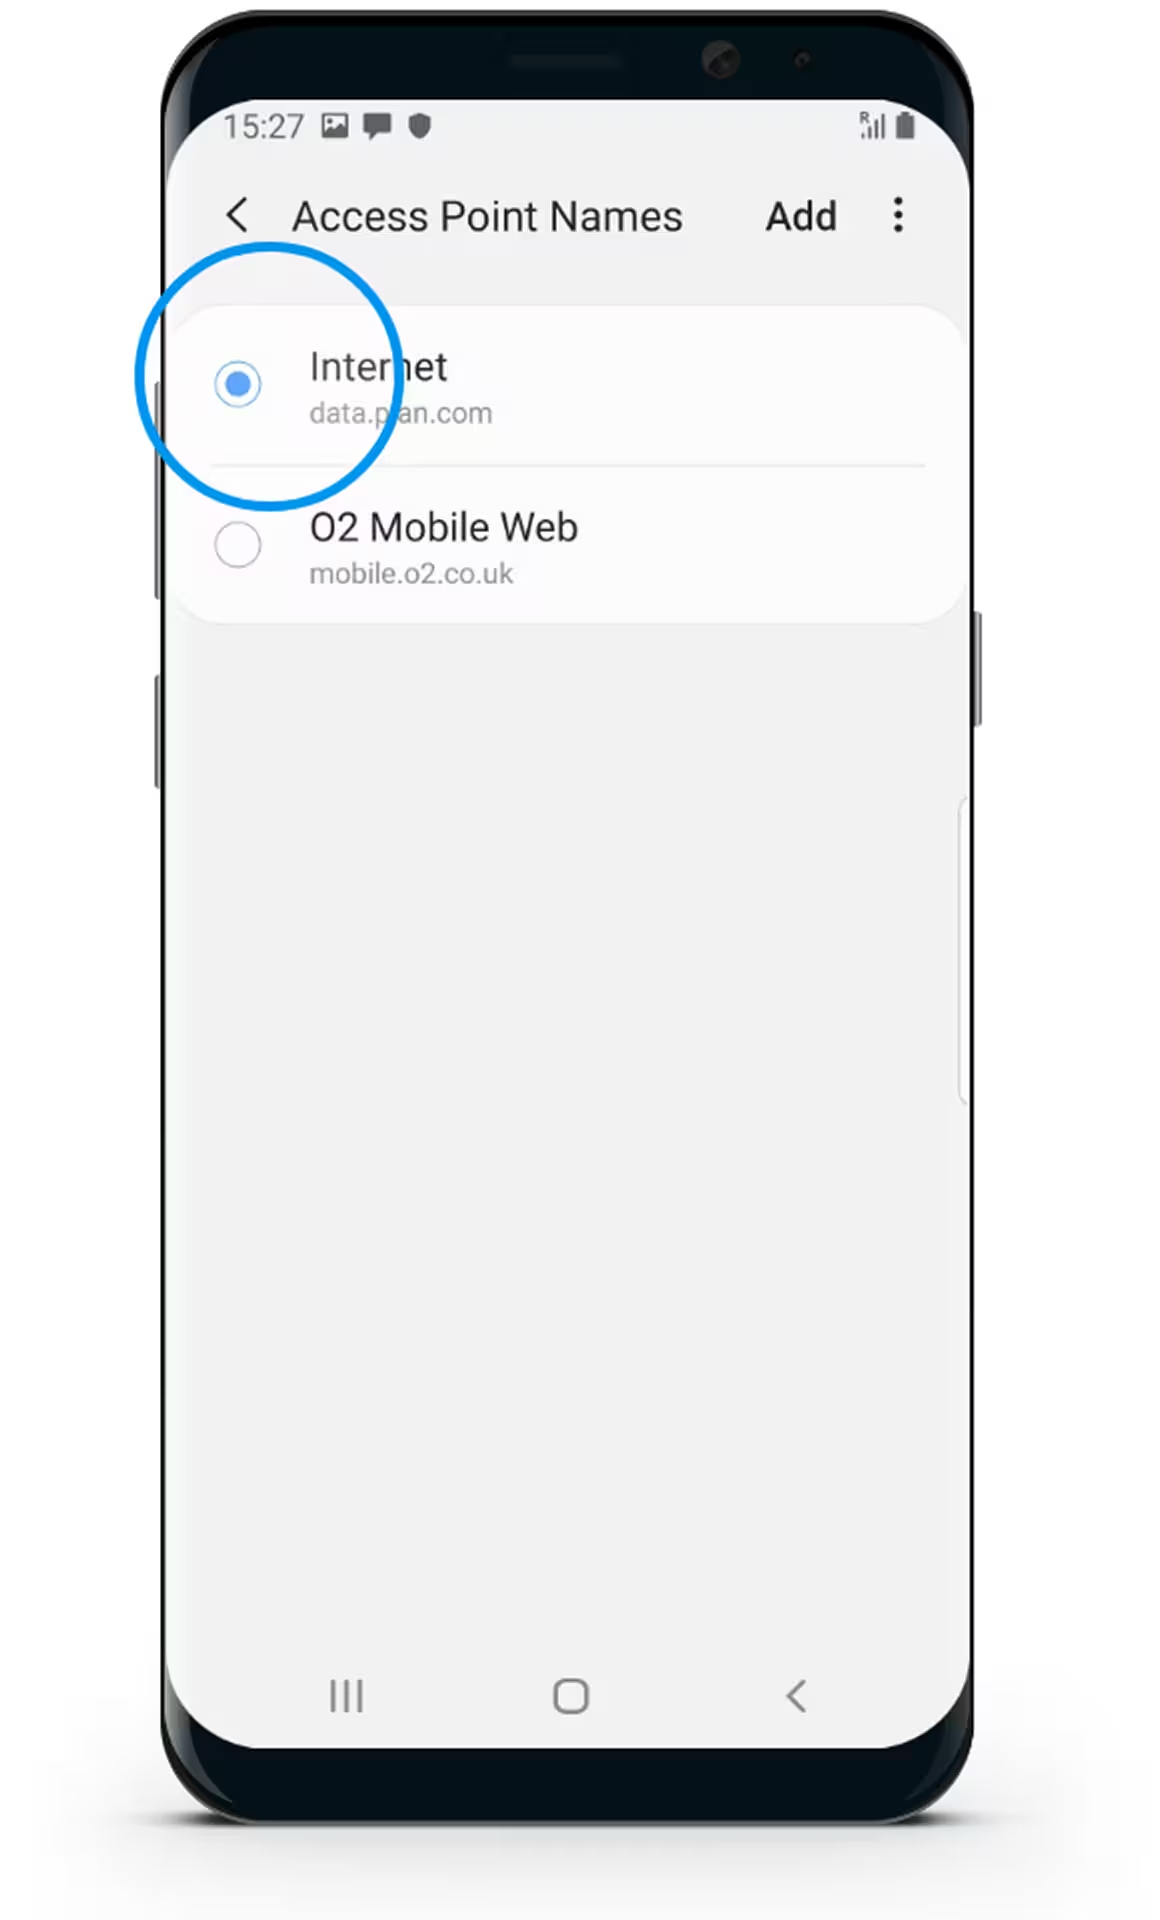
Select “Internet”
Select Save

Your phone has now been set up to Internet

Setting up MMS
MMS only available to customers on the O2 Network through plan.com
In Access Point Names, select Add

Setting up MMS
MMS only available to customers on the O2 Network through plan.com
Select Name & Enter "MMS"
Setting up MMS
MMS only available to customers on the O2 Network through plan.com
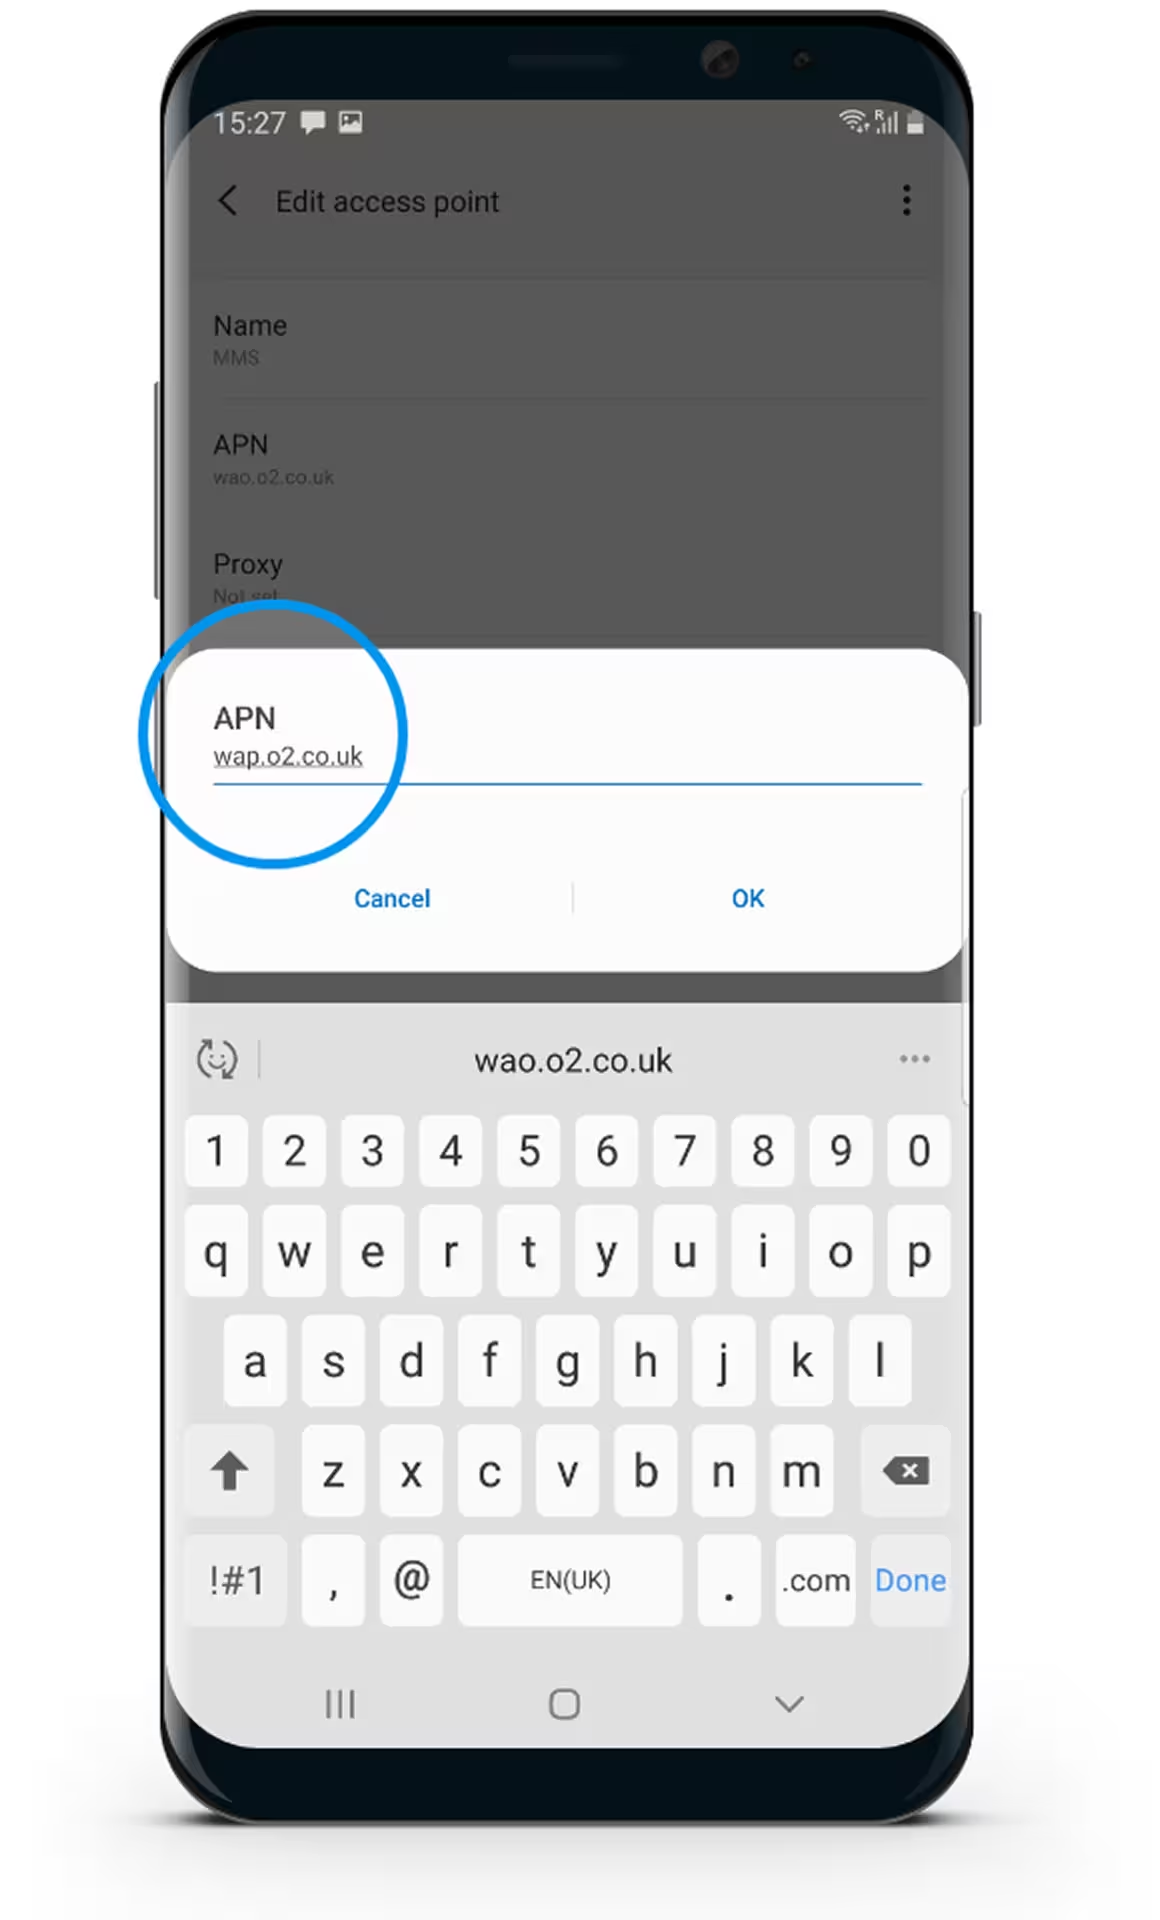
Select APN & Enter "wap.o2.co.uk"
Setting up MMS
MMS only available to customers on the O2 Network through plan.com
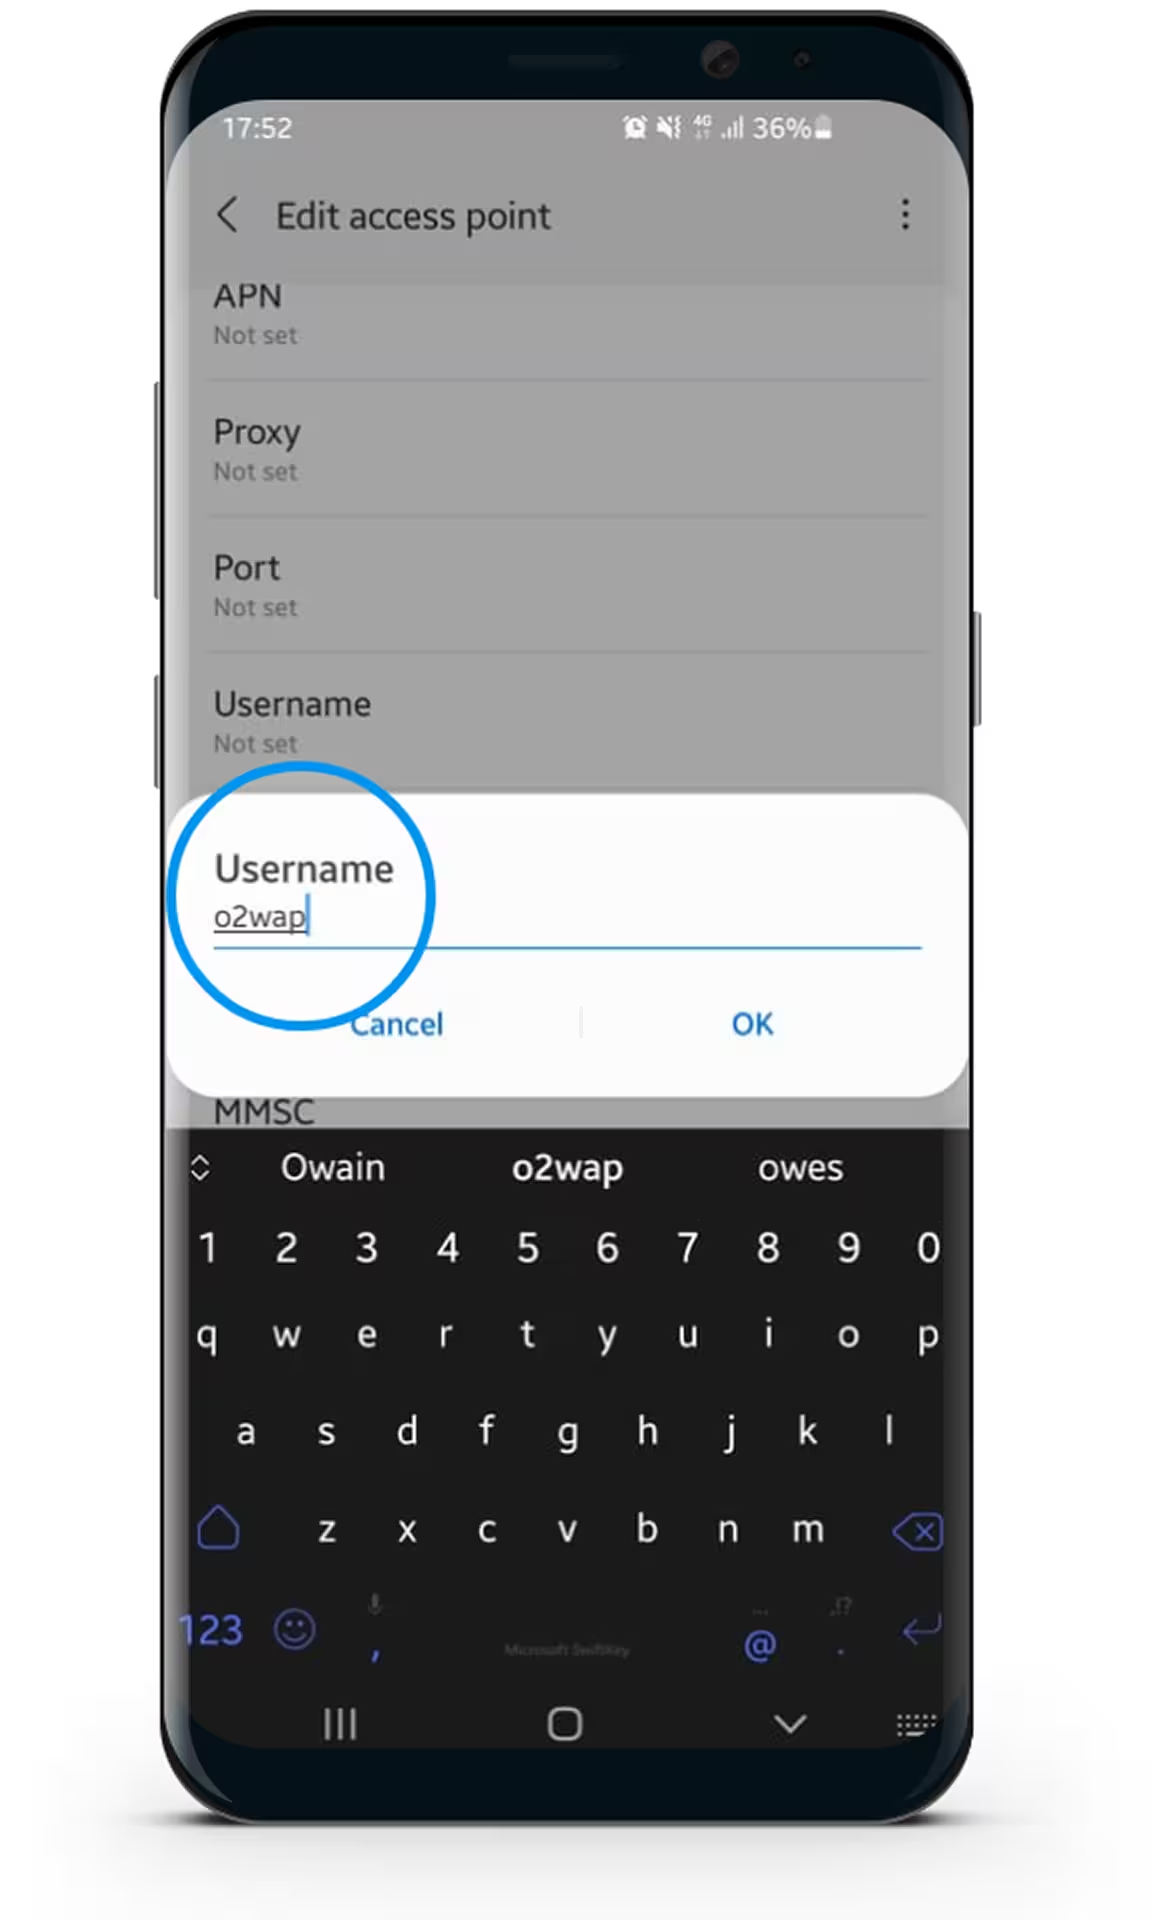
Select Username & Enter "02wap"
Setting up MMS
MMS only available to customers on the O2 Network through plan.com
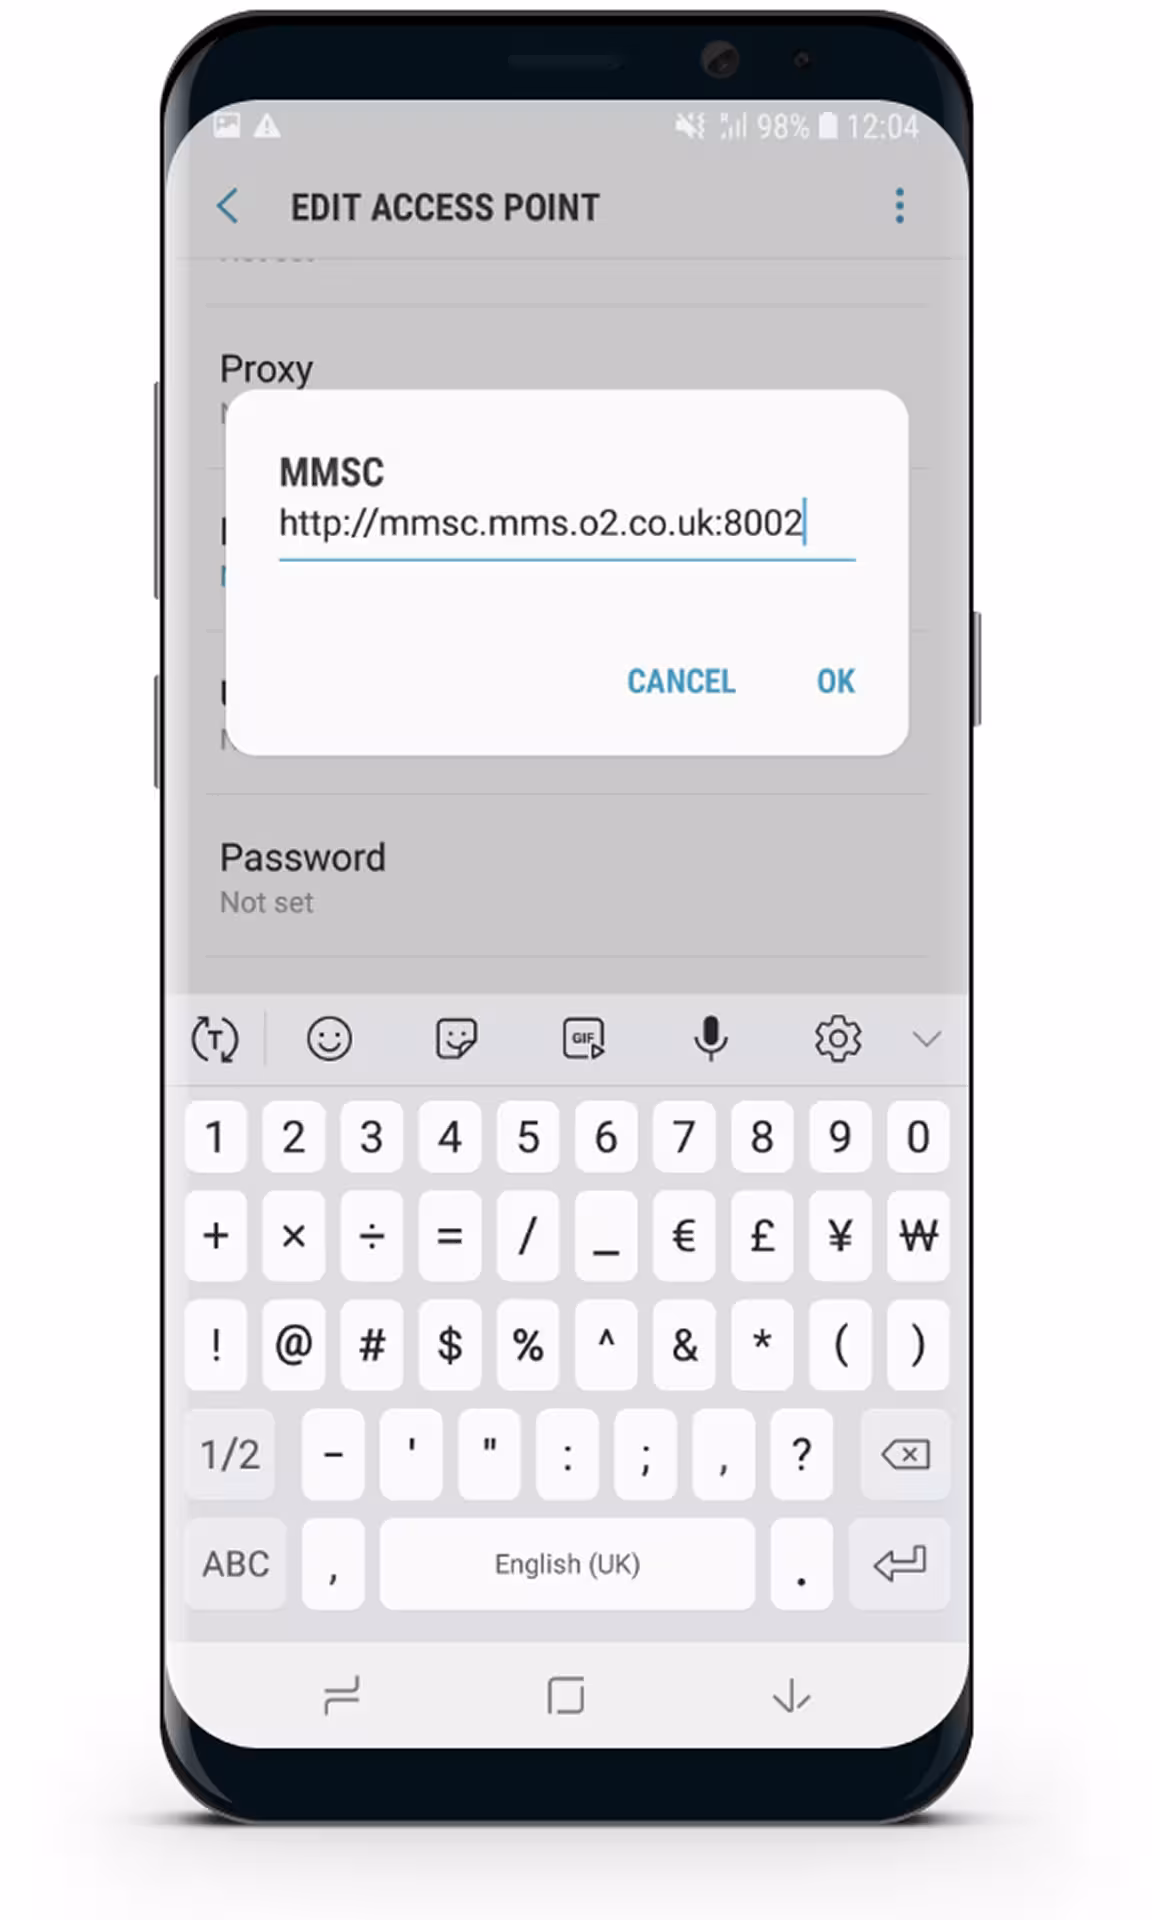
Select MMSC & Enter “http://mmsc.mms.o2.co.uk:8002”
Setting up MMS
MMS only available to customers on the O2 Network through plan.com
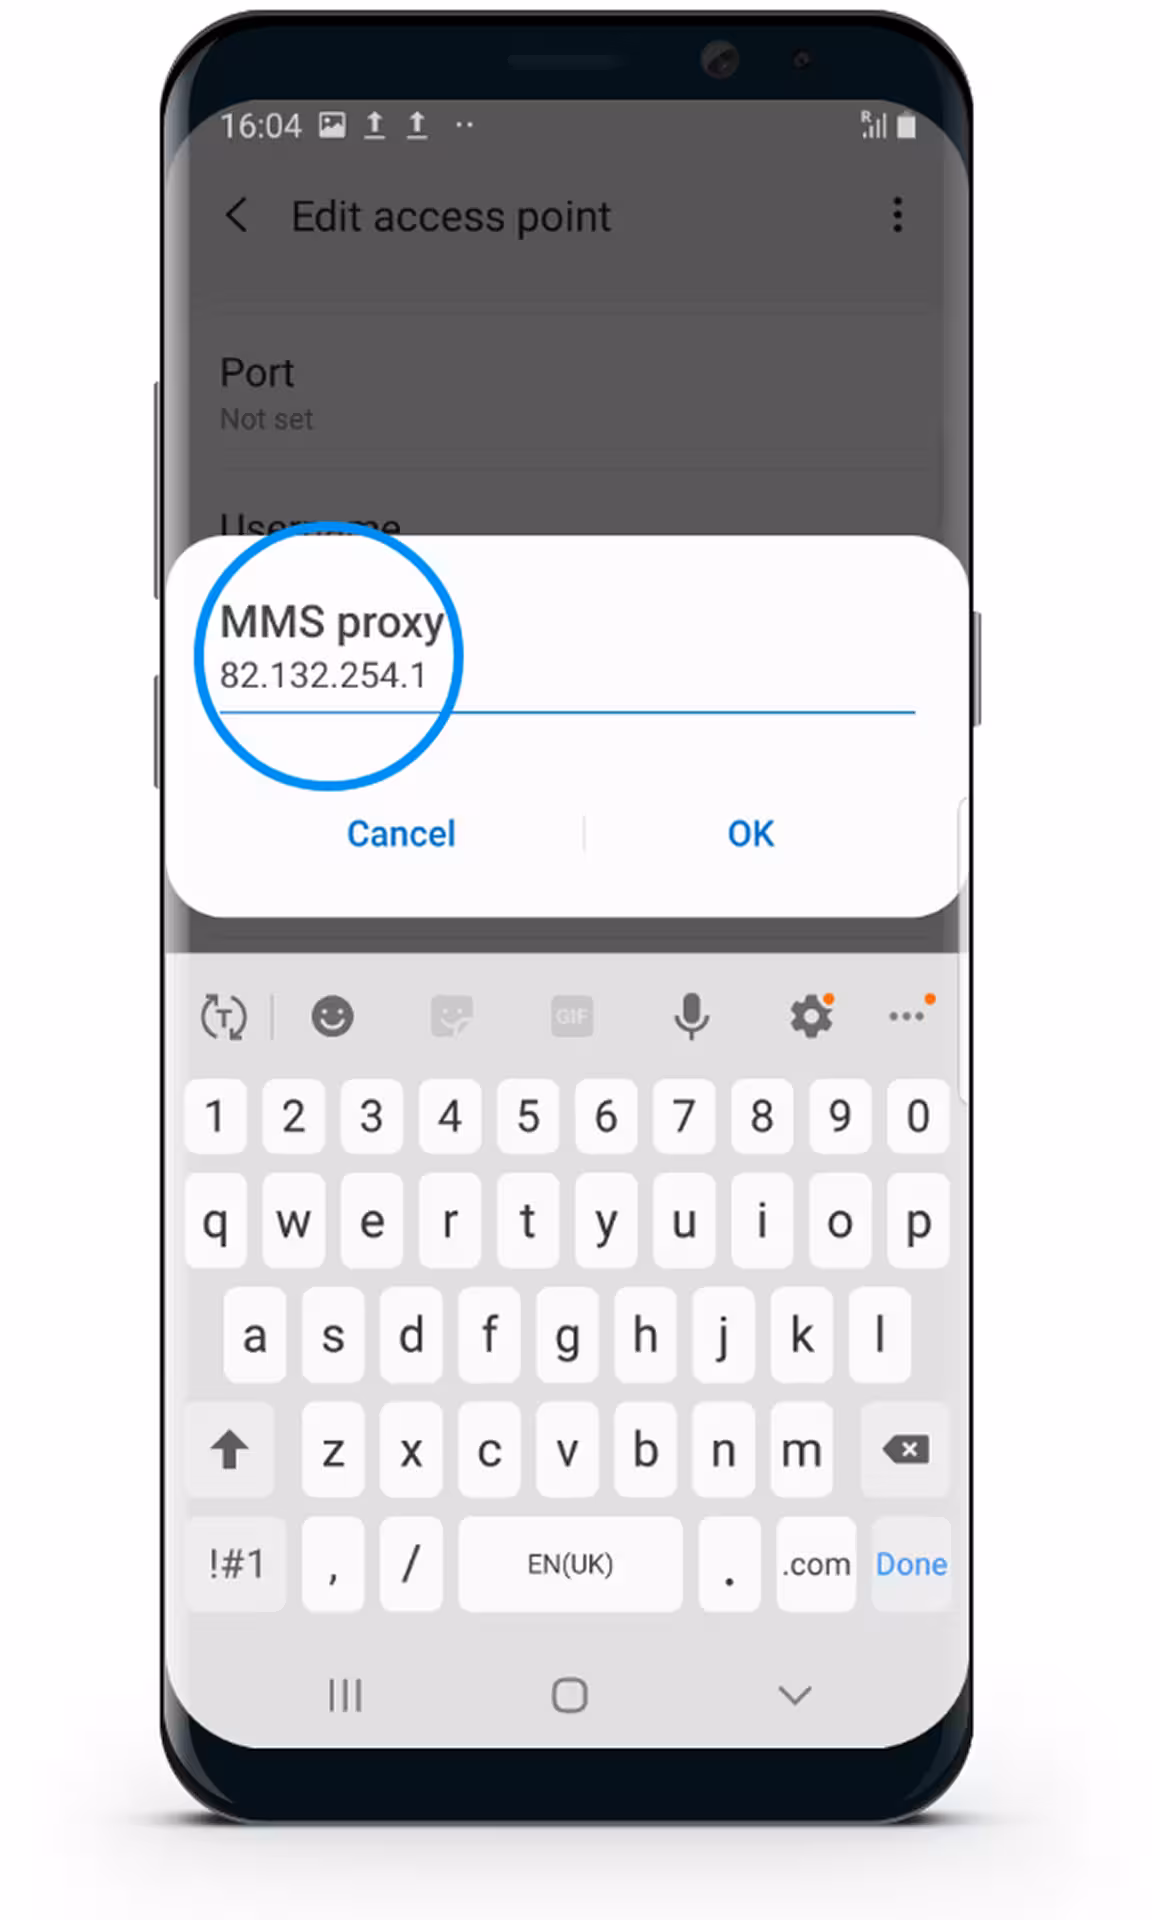
Scroll down and select MMS Proxy & Enter "82.132.254.1"
Setting up MMS
MMS only available to customers on the O2 Network through plan.com
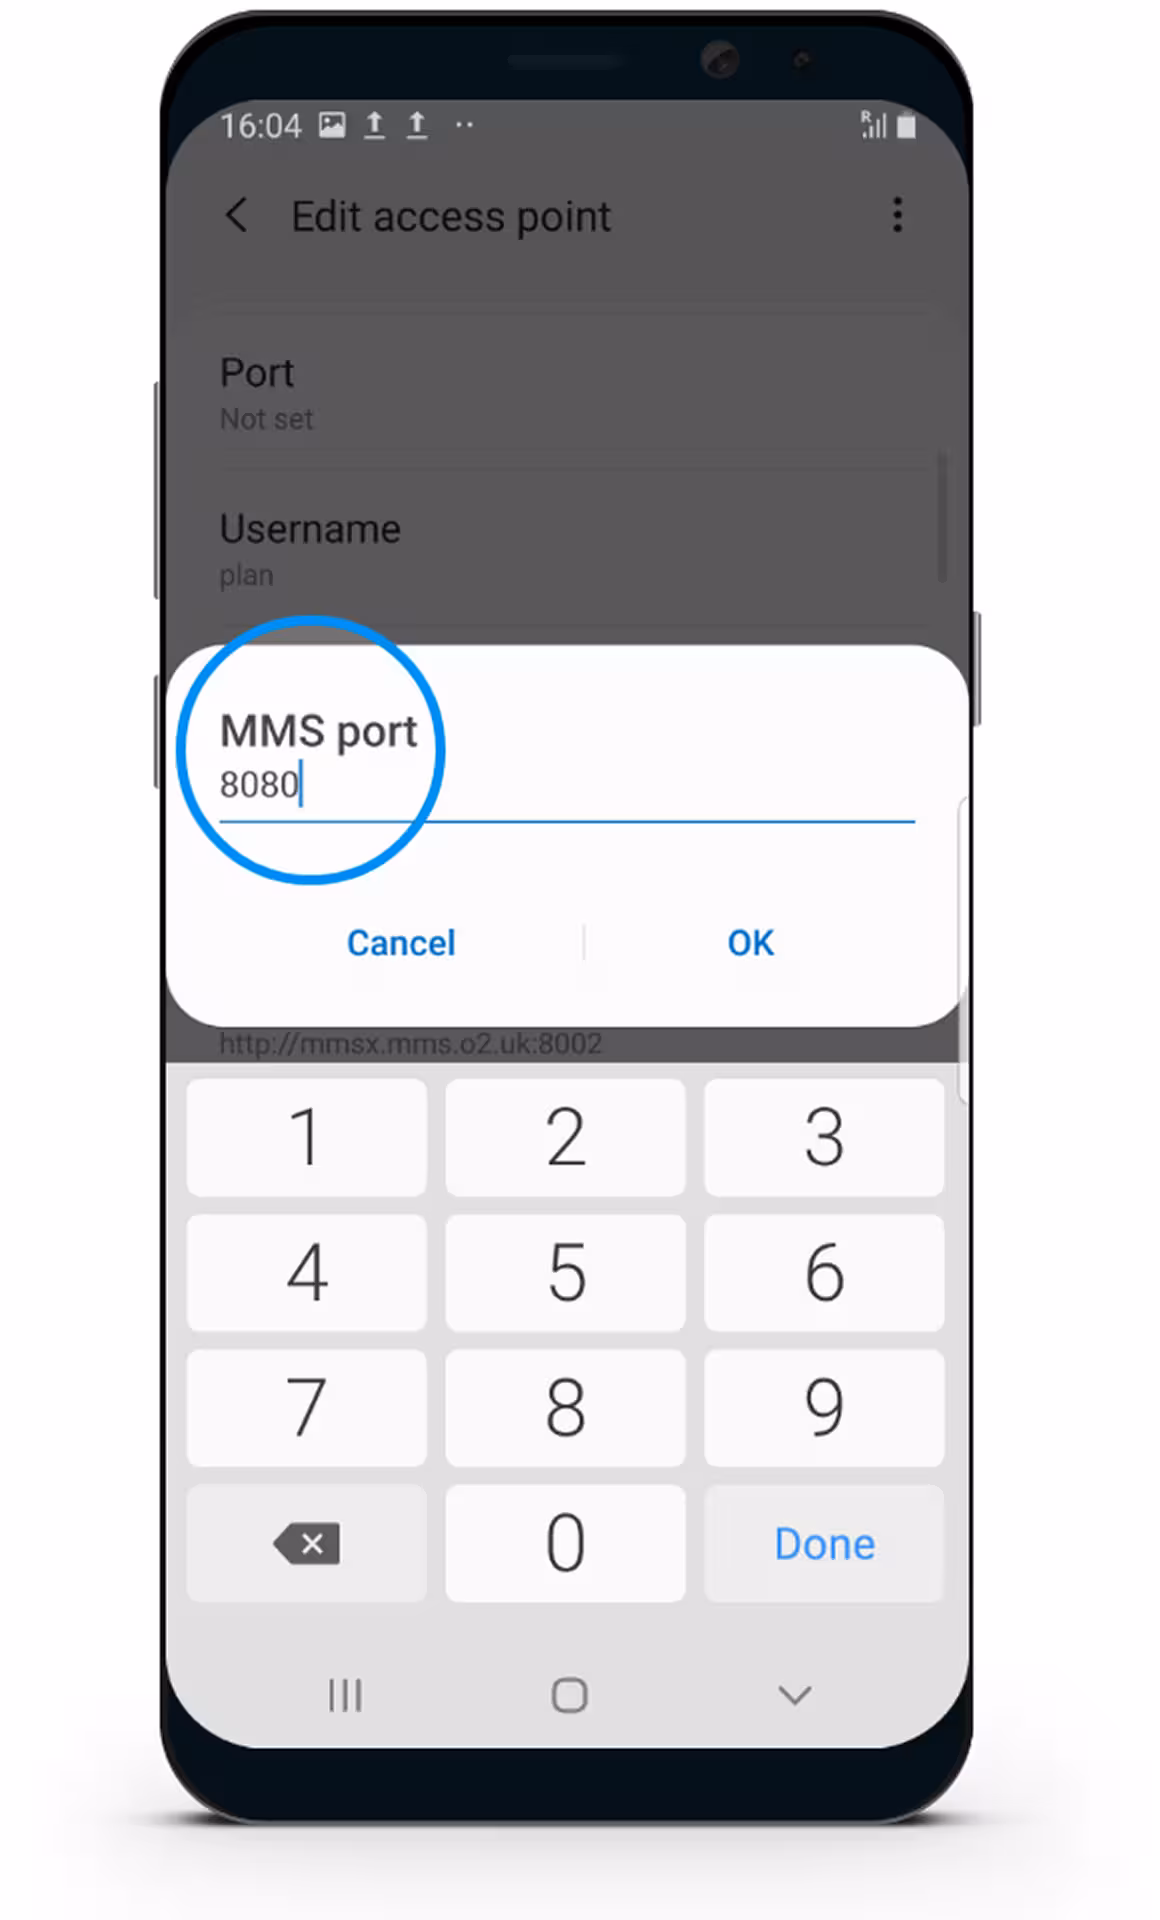
Select MMS Port & Enter "8080"

Setting up MMS
MMS only available to customers on the O2 Network through plan.com
Select MCC & Enter "234"
Setting up MMS
MMS only available to customers on the O2 Network through plan.com
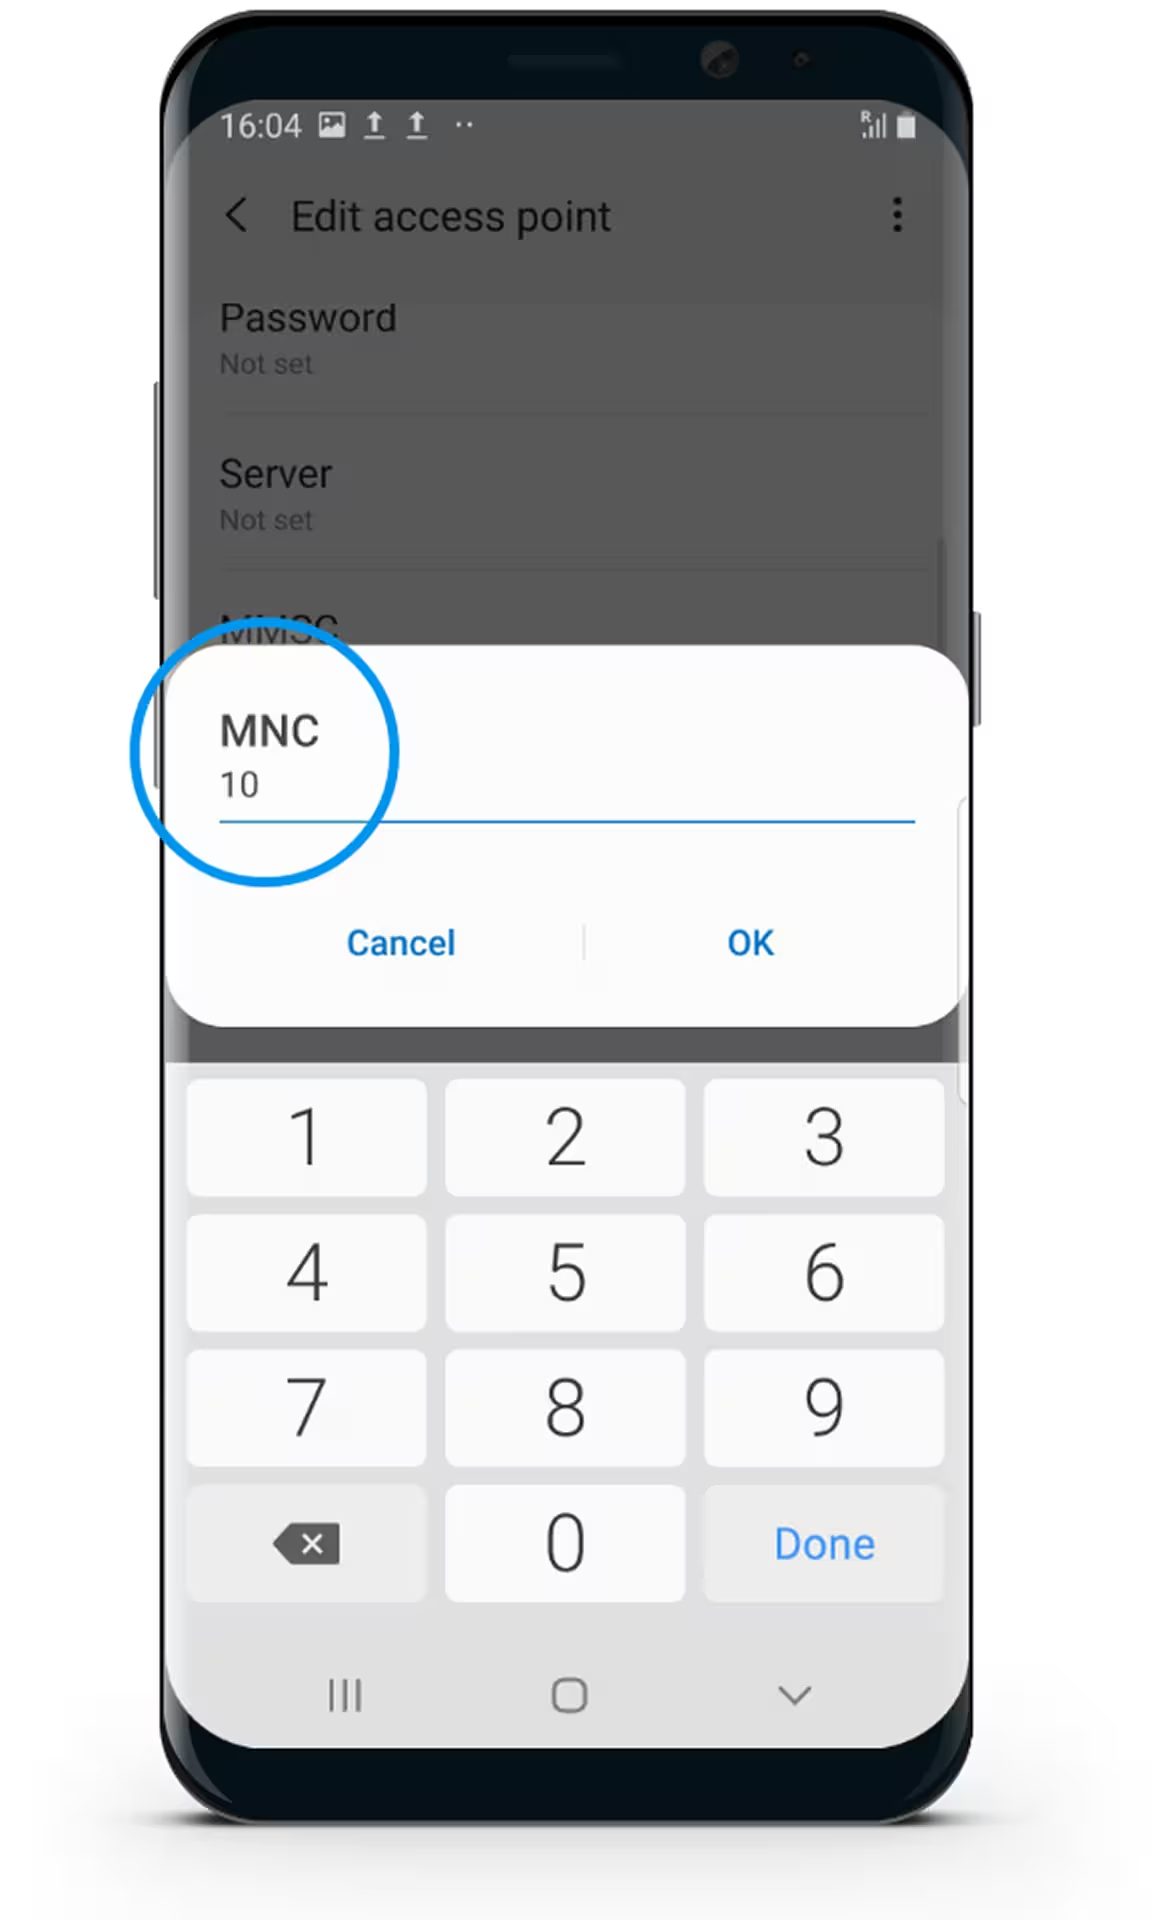
Select MNC & Enter "10"
Setting up MMS
MMS only available to customers on the O2 Network through plan.com
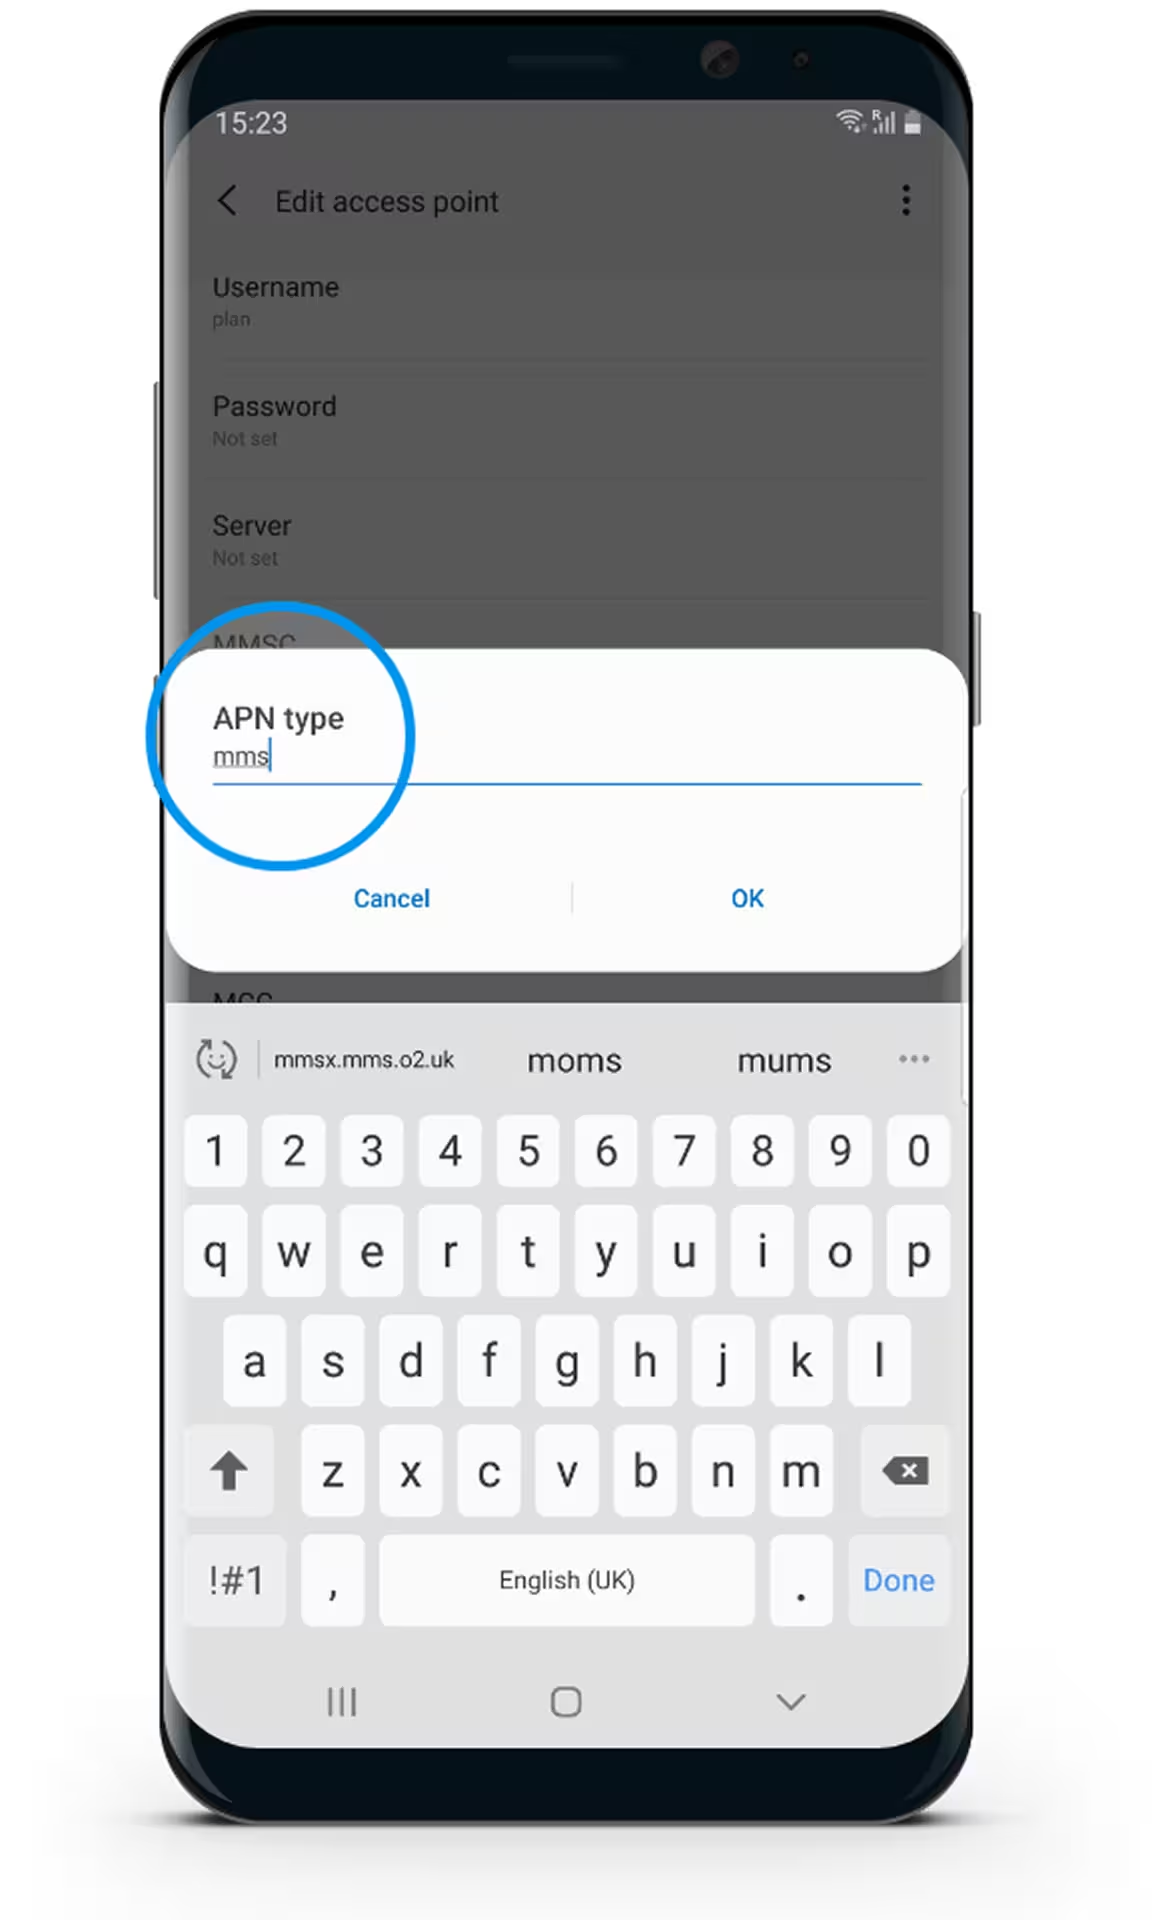
Select APN Type & Enter "mms"
Setting up MMS
MMS only available to customers on the O2 Network through plan.com
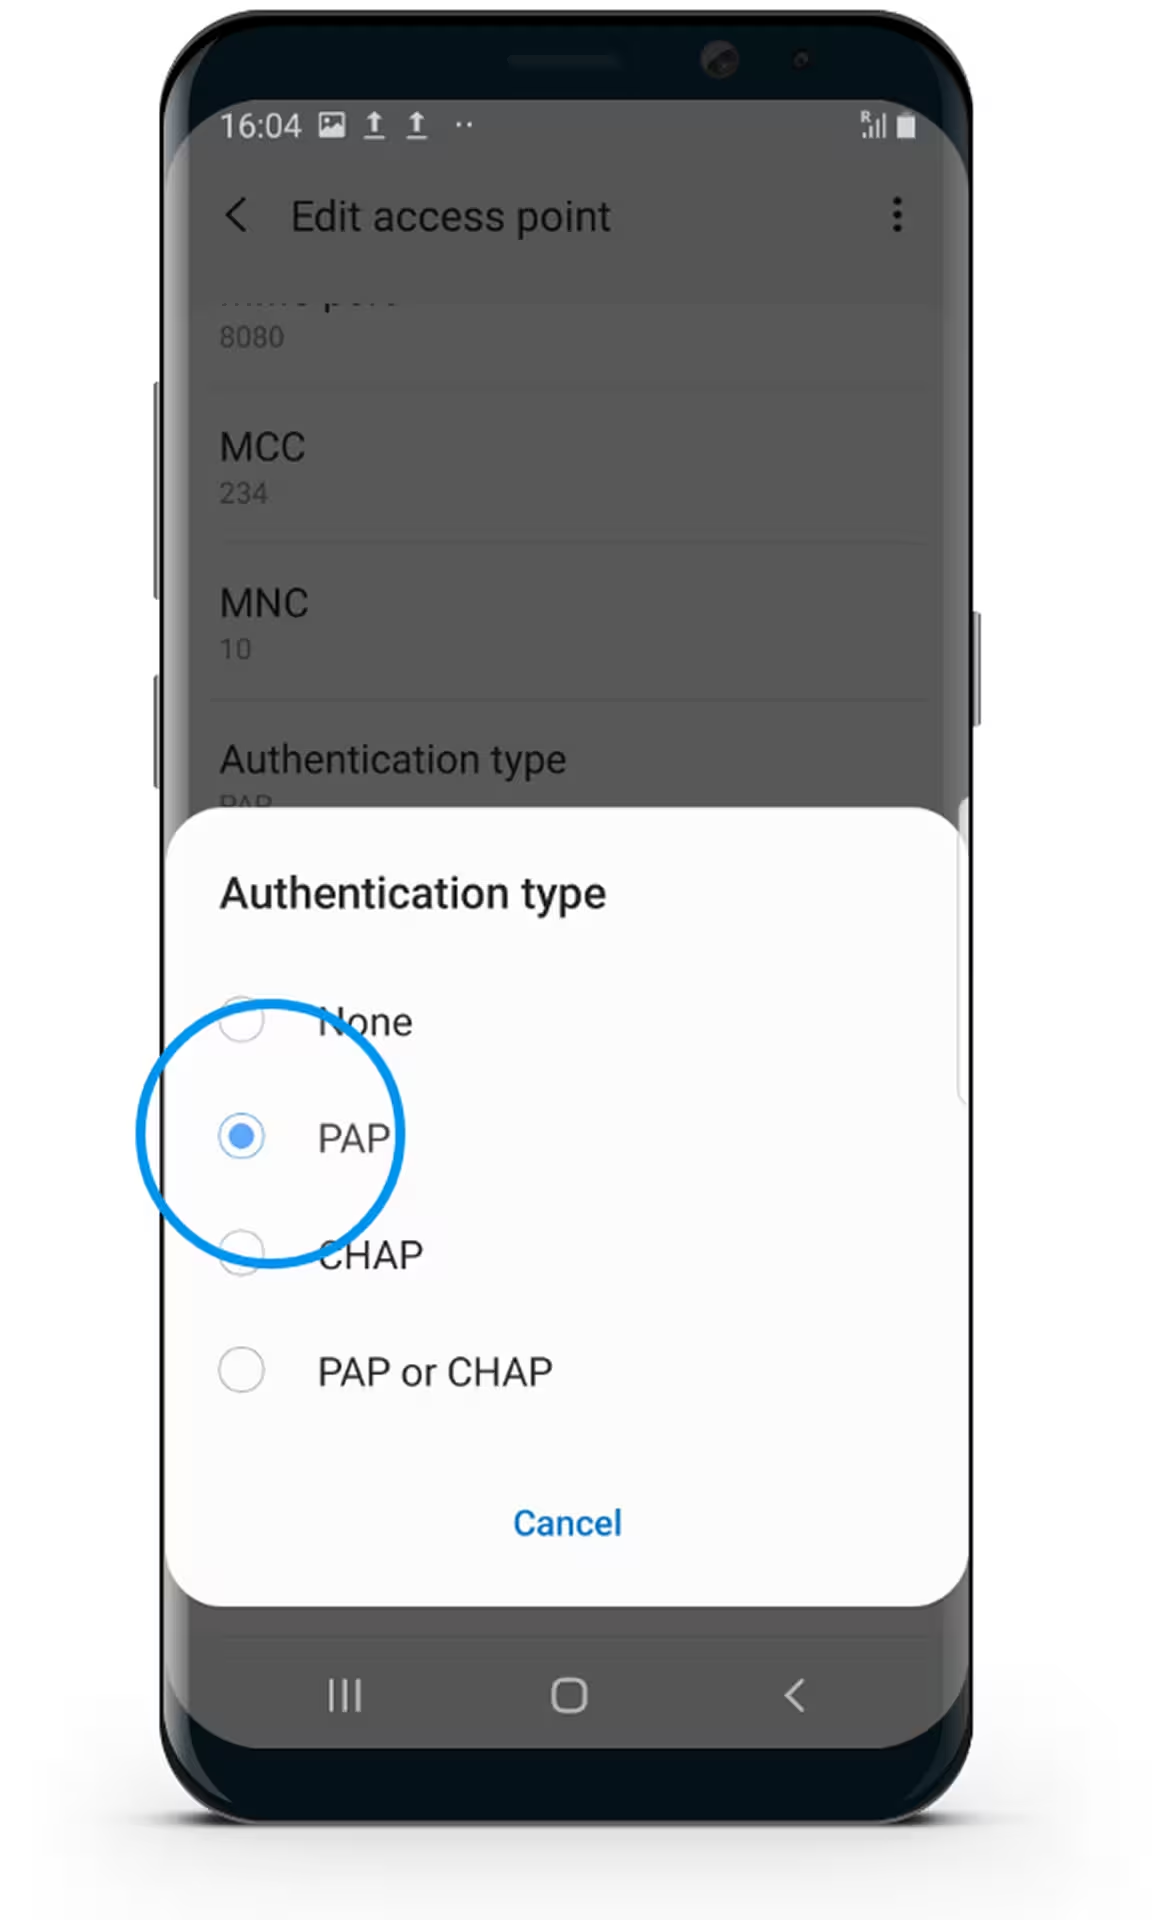
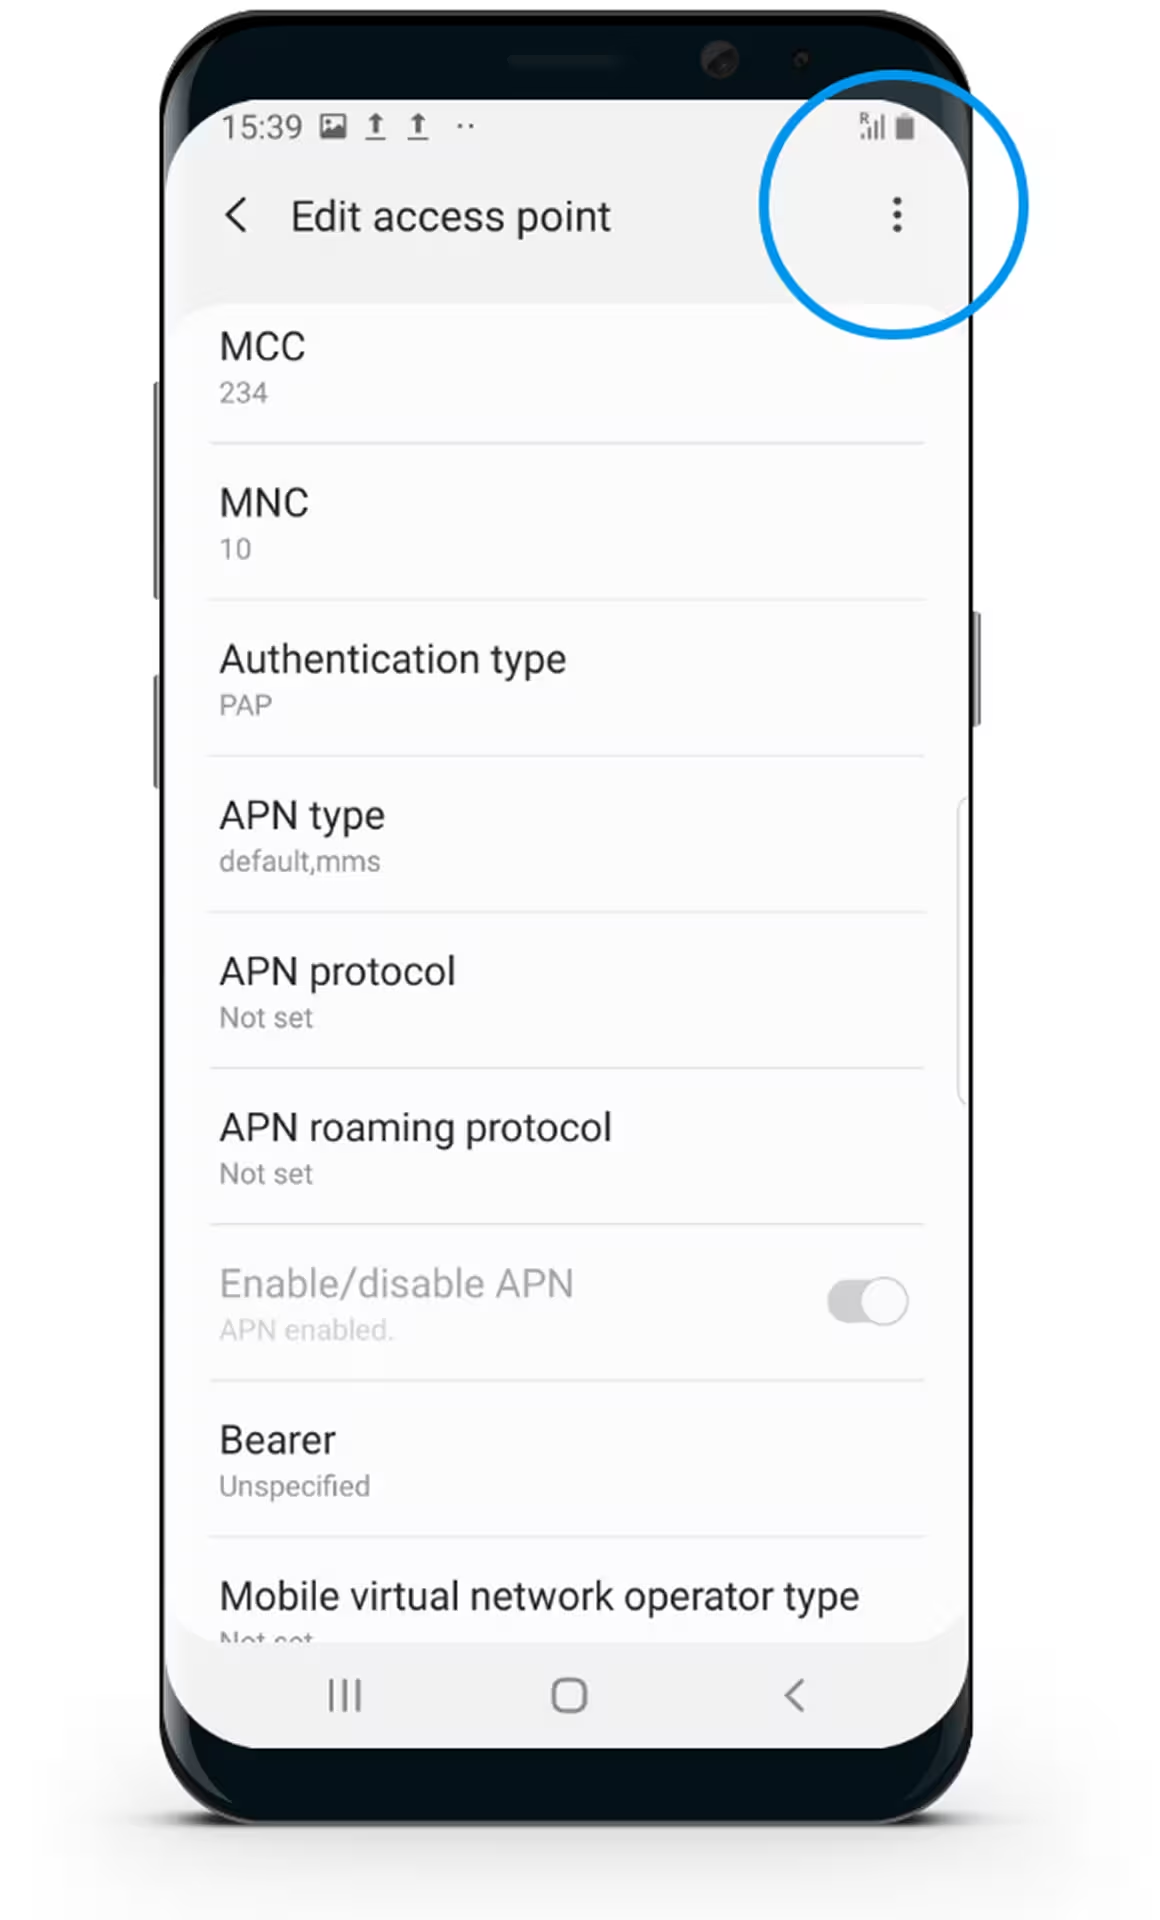
Select Authentication Type & Select "PAP"
Setting up MMS
MMS only available to customers on the O2 Network through plan.com
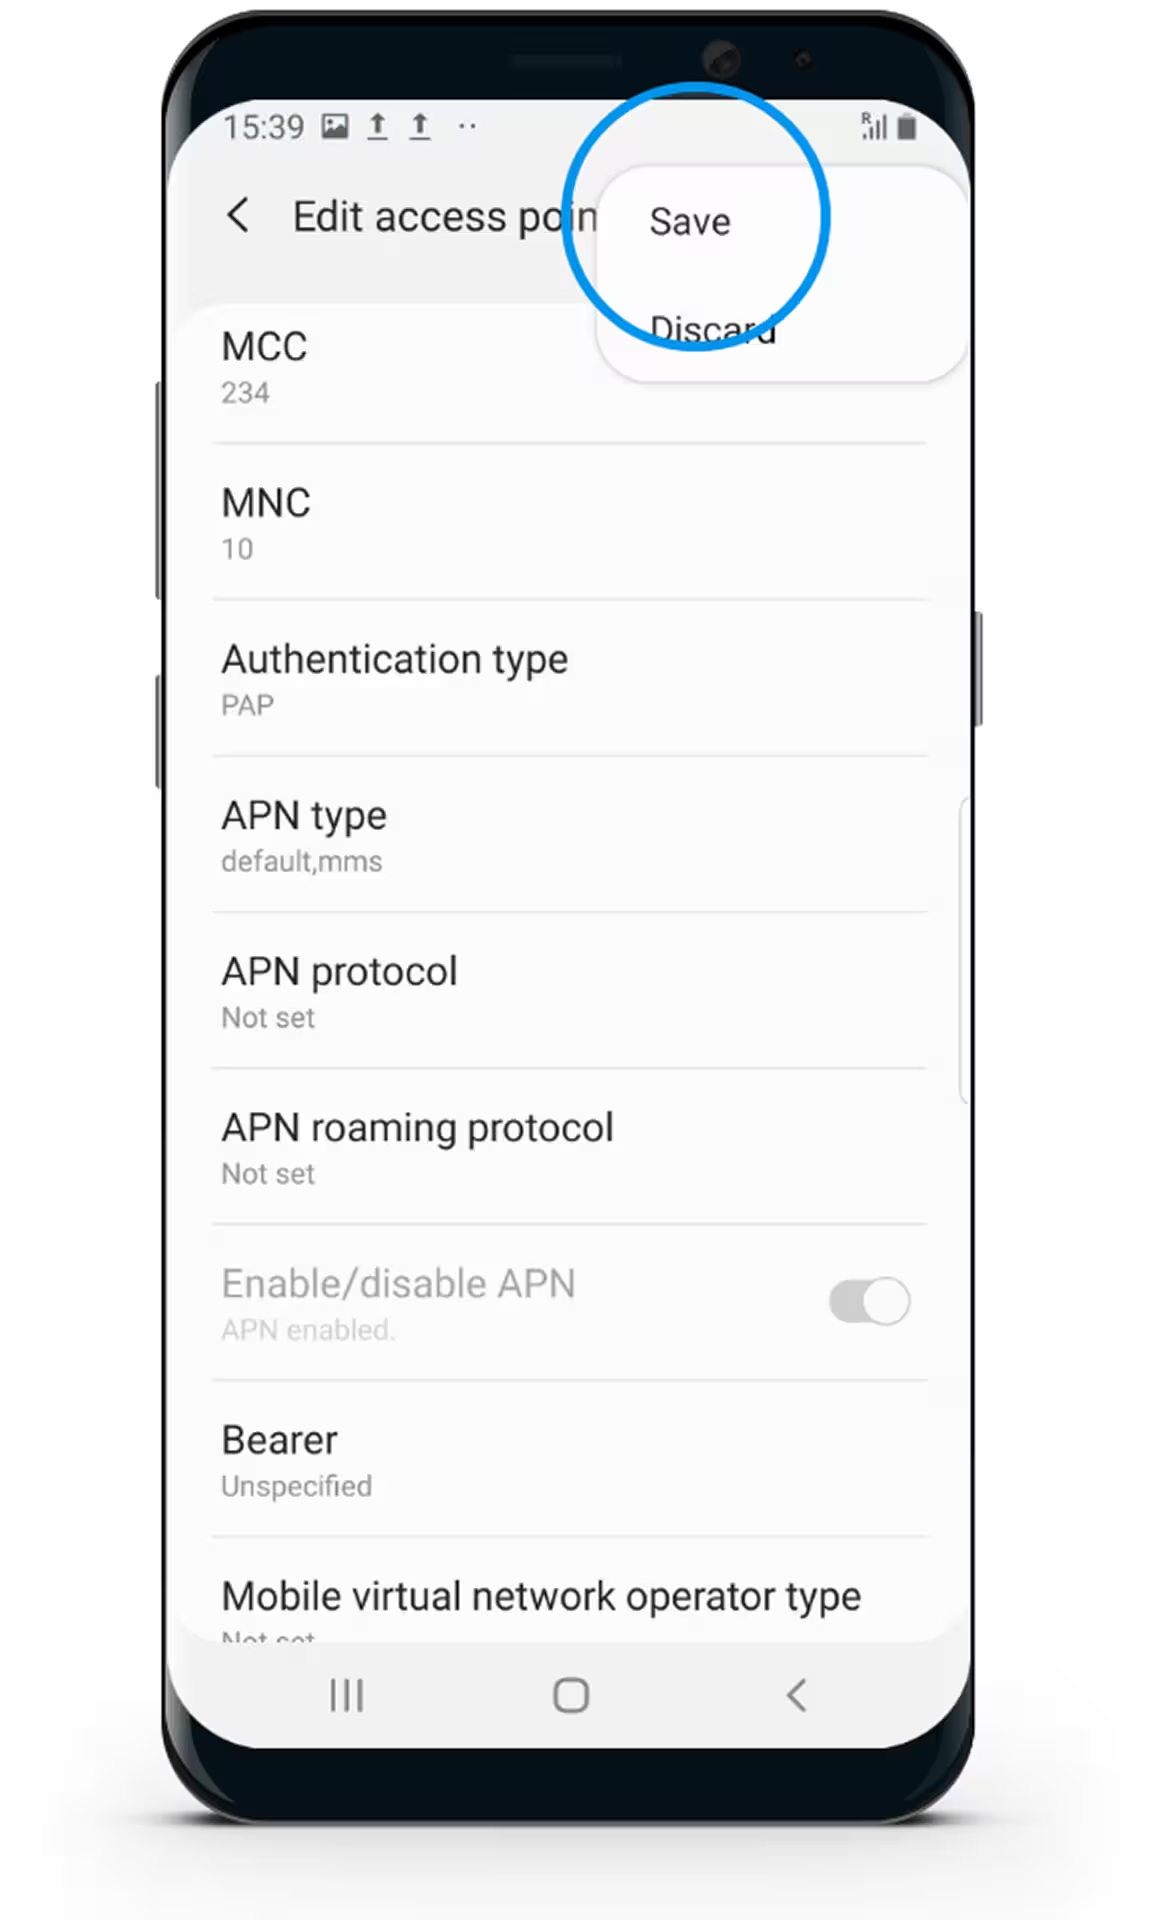
Select the Menu button
Setting up MMS
MMS only available to customers on the O2 Network through plan.com
Select Save

Setting up MMS
MMS only available to customers on the O2 Network through plan.com
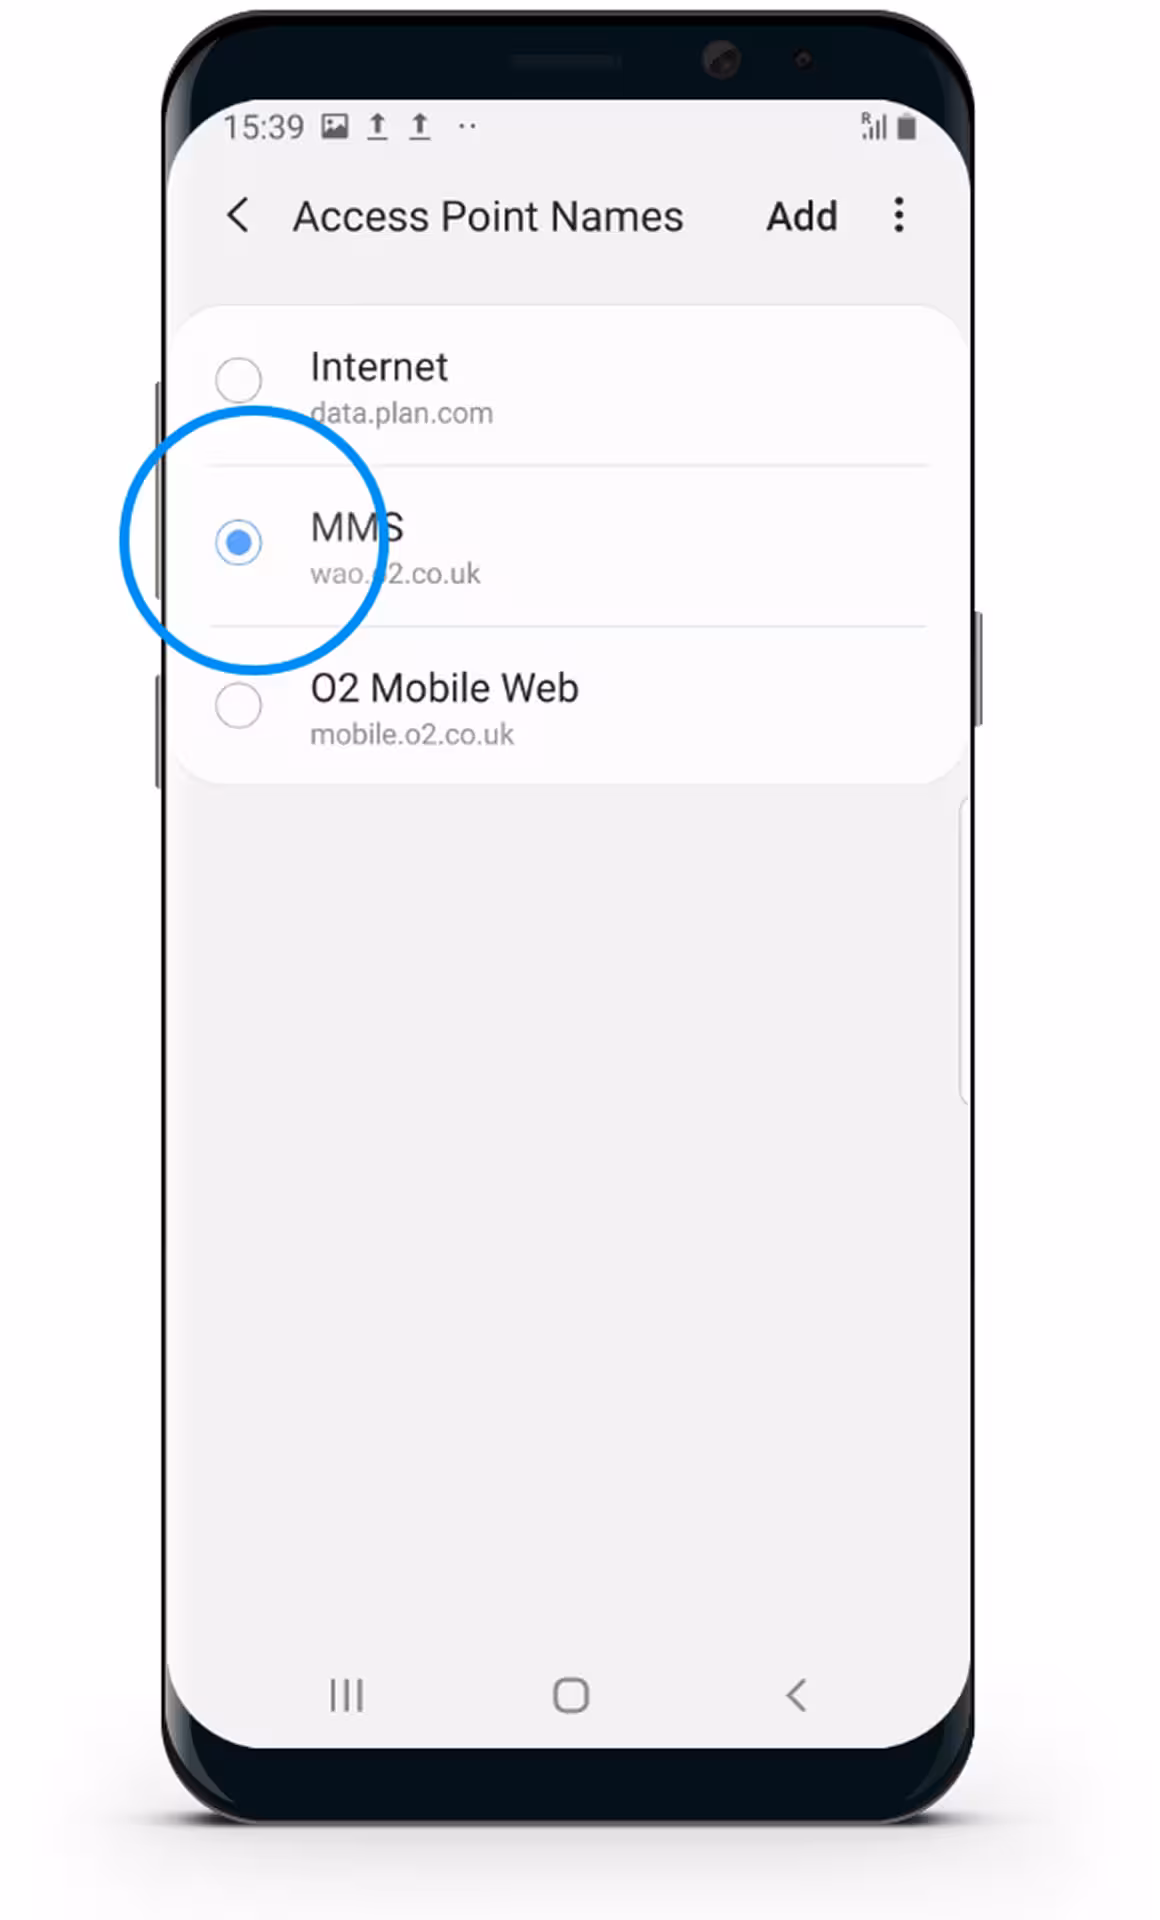
Select “MMS”
Setting up MMS
MMS only available to customers on the O2 Network through plan.com
Your phone has now been set up to MMS